This post will give instructions for building a compost bin, and for what to put in your compost bin. Compost is the best method of fertilizing your garden, and you can create your own compost with materials you might otherwise have sent to the dump. For more on fertilizing your plants, check out my related post.
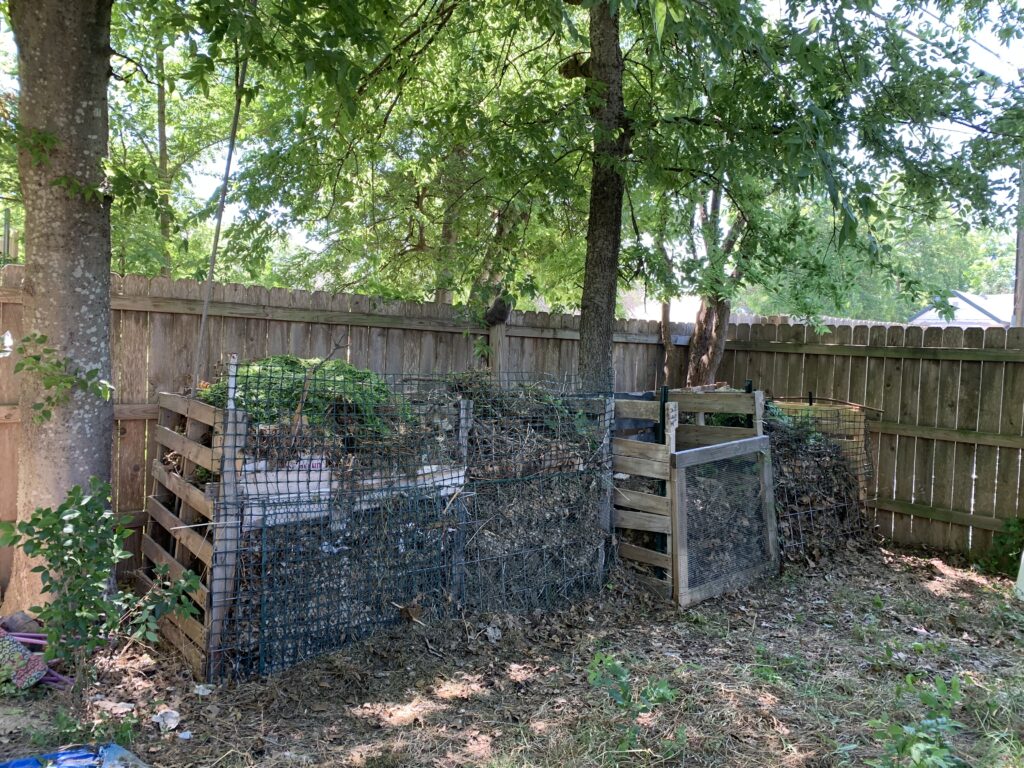
If you want a beautiful compost bin, and you have the spare change to build it, you could try this method.
If you don’t have building skills, don’t have a lot of money, and are not that interested in building something beautiful just to keep your compost, it is easy to create a compost bin from mostly free materials.
What I did was pick up some pallets that were being given out free at a business near my home. I had in mind to build a compost bin, and I passed by the sign that said “Free Pallets” so I stopped and picked up a few.
Later when we got ready to build lea’s compost bin, I passed a pallet that was leaning up against a dumpster, so I snagged that one. It is usually easy to find pallets at some location or another. Just keep your eyes peeled, as Grandpa Bob used to say.
Select a Location to Build Your Compost Bin
Building your compost bin in the best spot will help guarantee success in the process. Select a location that is not in direct sun. You want your compost to “cook” itself, not have the sun cook it for you.
Also, choose a location where water doesn’t run on or under the bin. You are going to want to keep your compost bin wet but not sopping.
Compost Bin Materials
Before you can start building your compost bin, you will need to assemble the materials. For the first compost bin you will need 3 pallets, 2 t-posts, and 6 large cable ties. For each add-on bin, you will only need 2 pallets. Assemble the pallet by using t-posts from your local home improvement store or hardware store. Even better, find some at an estate sale and you can save a lot of money. You will place the t-posts between the boards of the pallet which you have standing on its side.
Beginning to Build Your Compost Bin
The right and the left side of your compost bin will be each use 1 pallet, and the third pallet is for the back. With the help of a buddy, set the pallets up starting with the left side. You will notice that the pallet is two layers of wood, with a space between the layers.
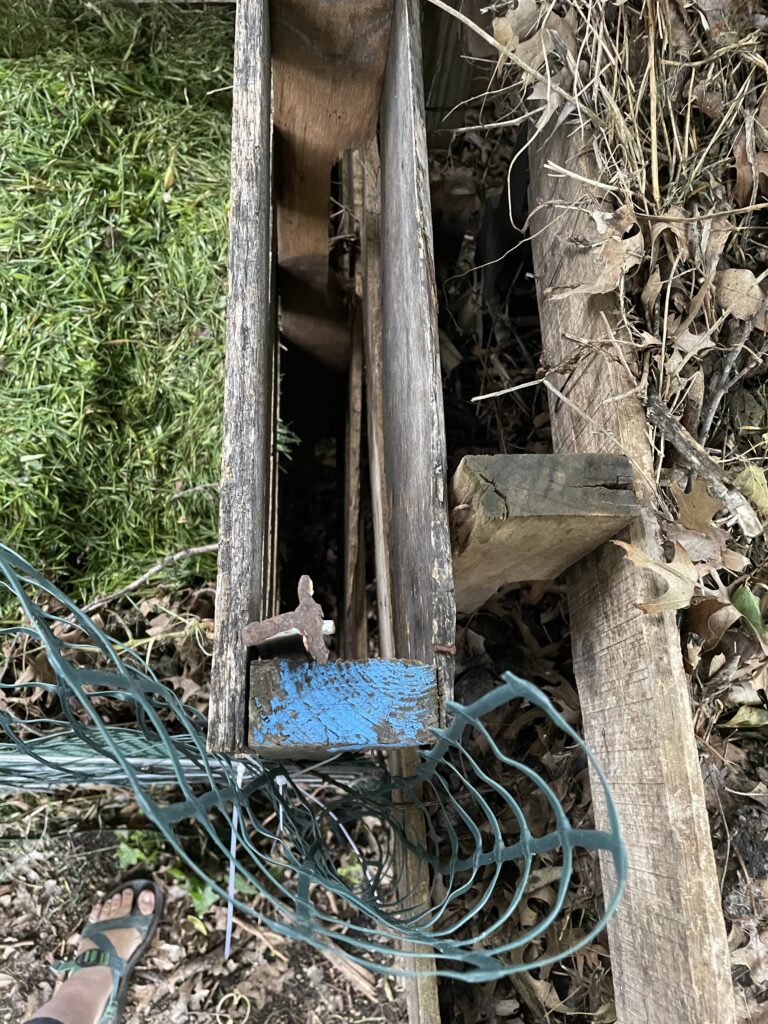
Put a t-post at the front of the pallet in the space created by the top and the bottom of the pallet. Hammer it into the ground with a sledge hammer.
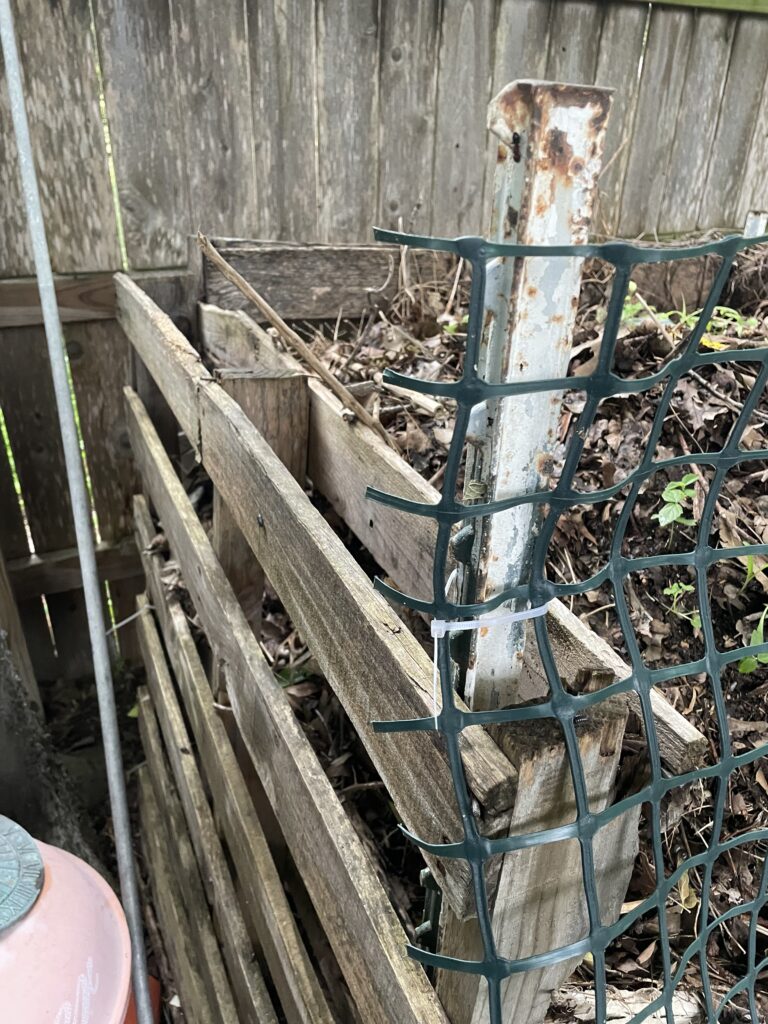
Put the back pallet in place, and use cable ties to join the side to the back.
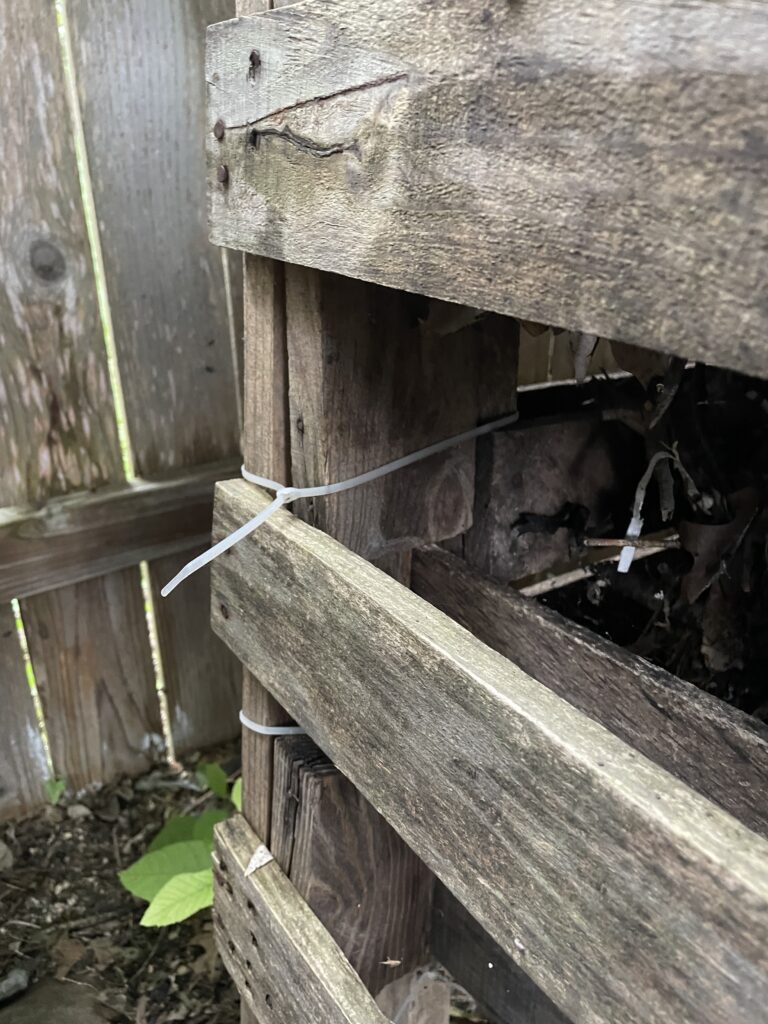
Next add the right side, making the U shape. Join this pallet to the back with cable ties as well. Then, put a t-post at the front of the right side.
If you are like my daddy and like to be really, super sure nothing is going to move, add another t-post to the right and left back corner. I didn’t do this and my compost bins are quite stable just from the stability of the pallet itself.
If you want to add a second “bay” to your compost bin, you need only have 2 more pallets, and 1 more t-post, and 3 more cable ties. Add the fourth pallet to the back and cable tie it to the back and the right side of the first bay. This makes the back of the second bin. Then cable tie the fifth pallet to the corner of the back of the second bay, and add the t-post inside the front of the new right side. Your U now looks kind of like a W with flattened points. \_/\_/
Begin the Composting in Your Compost Bin
After you have filled the bin to the top, don’t add anything else and let it sit. If you are lazy, like me, just let it sit for a very long while, and when it is a fine consistency use it.
I am now up to four bins to hold the contents of a year’s worth of vegetative matter from my beds and my yard.
How Many Bays Will You Build on Your Compost Bin?
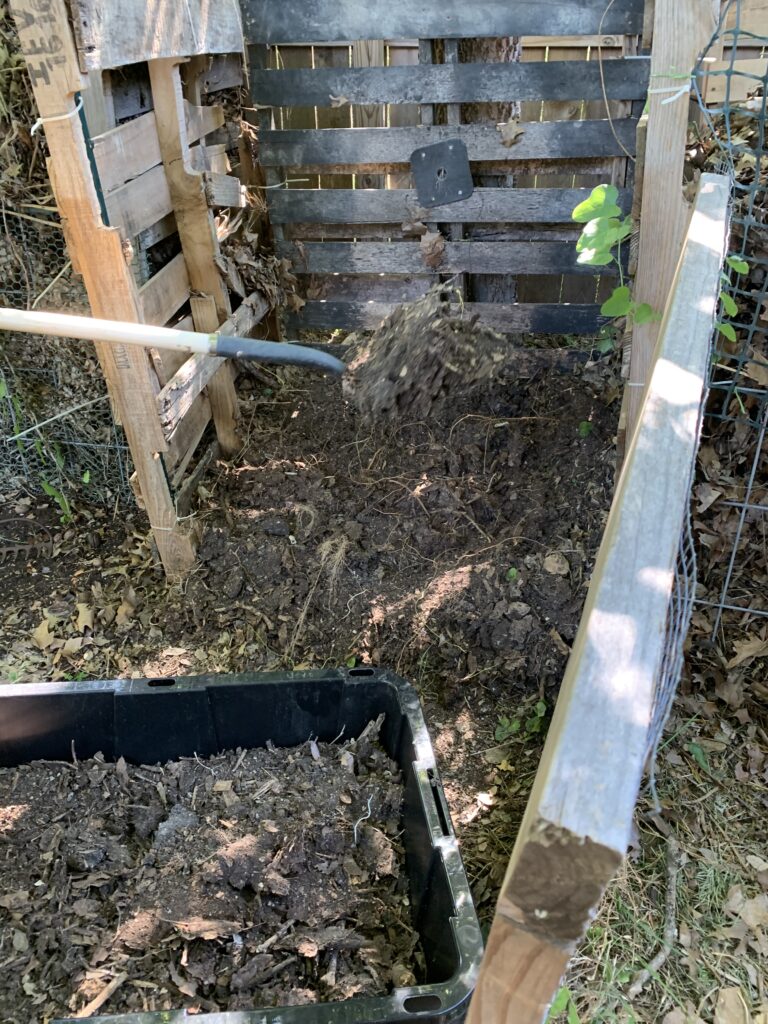
Two bays is really the minimum you want because when you get ready to shovel the decomposing stuff in the first side, having a place to shovel it into is a big help. Periodically, you can turn your compost by shoveling the contents of the first bay into the second bay.
If you are energetic, you can turn the compost more frequently and it will compost faster. If you are not so energetic, you can leave it to compost for a long time, and it will do the work itself. Even after you let it sit for a long time, you will likely need to move the upper materials to another bin, and find the better composted material on the bottom.
If the compost is not a fine enough consistency to suit you, shovel it again and let it sit again for a while. Continue shoveling it back and forth until it is the consistency you desire. Then it is ready to go on your garden.
Building your Compost Bin With a Door
You have several choices for how to create a door to keep all your goodies from falling out. You can skip this step if you don’t have enough compost matter to fall out the front.
Another Pallet
One is to use another pallet. Using cable ties to hold it on, you will have to remove the cable ties to empty or turn the bin.
A Wooden Frame
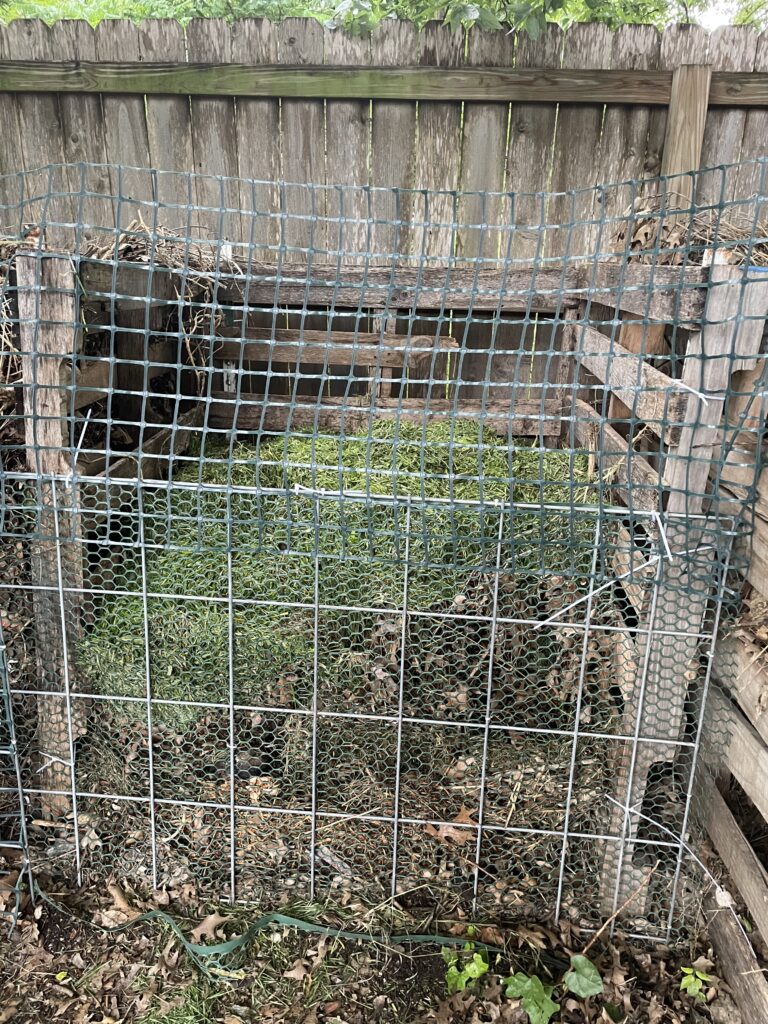
Another possibility to build a wooden frame, staple poultry netting or hardware cloth on it, and screw a hinge to the front of the pallet. Or attach it with cable ties as well. I like this option better because the smaller holes in the netting keeps more compost in.
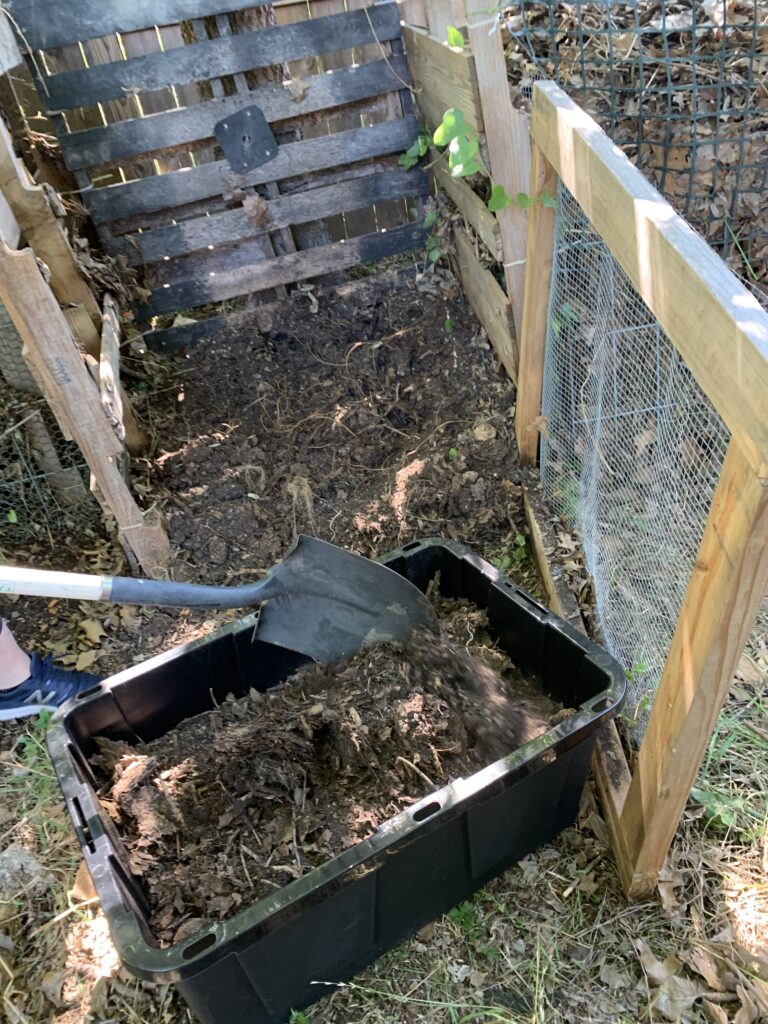
I was gifted some plastic netting so I used that, but it didn’t have enough structure, so I cable-tied it a leftover piece of livestock paneling. This makes it light weight but with structure and then also with small holes.
Different Doors on Different Bins
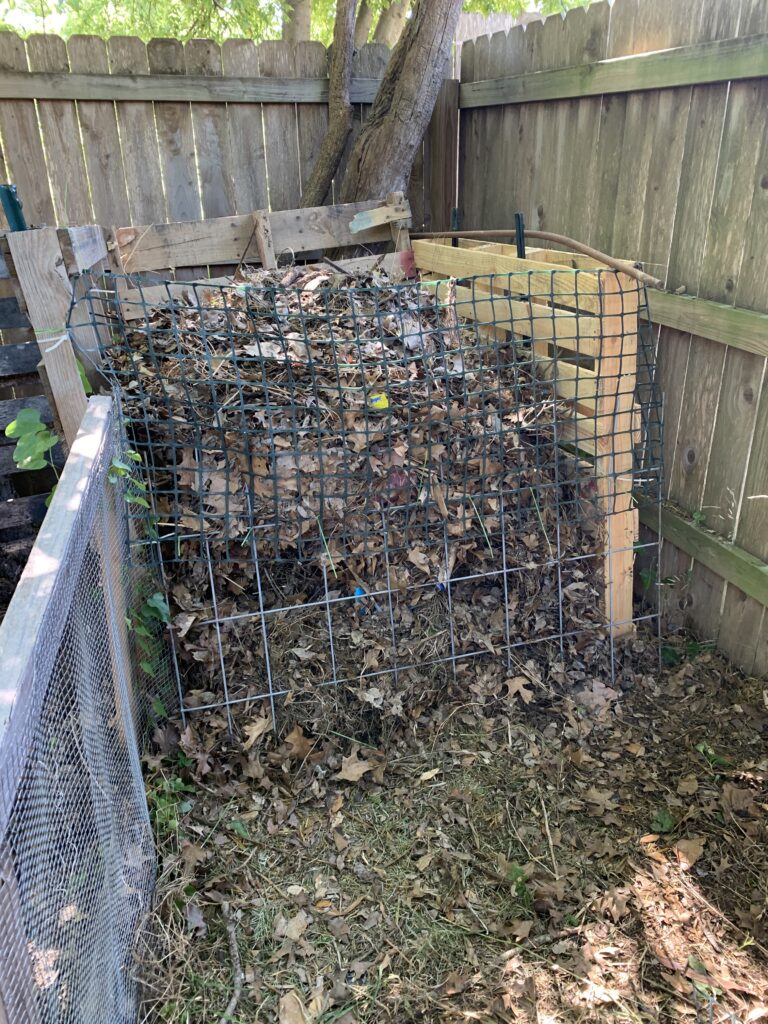
As you can see from the photos, I used both of the last two options on different bins. It ain’t pretty, but it works and it adheres to one of the principles of permaculture, which is to use onsite resources. If you have more of a desire to have a designer affect, I’m sure that there are many ways to accomplish the same goals and make it pretty.
Another Method of Building a Compost Bin
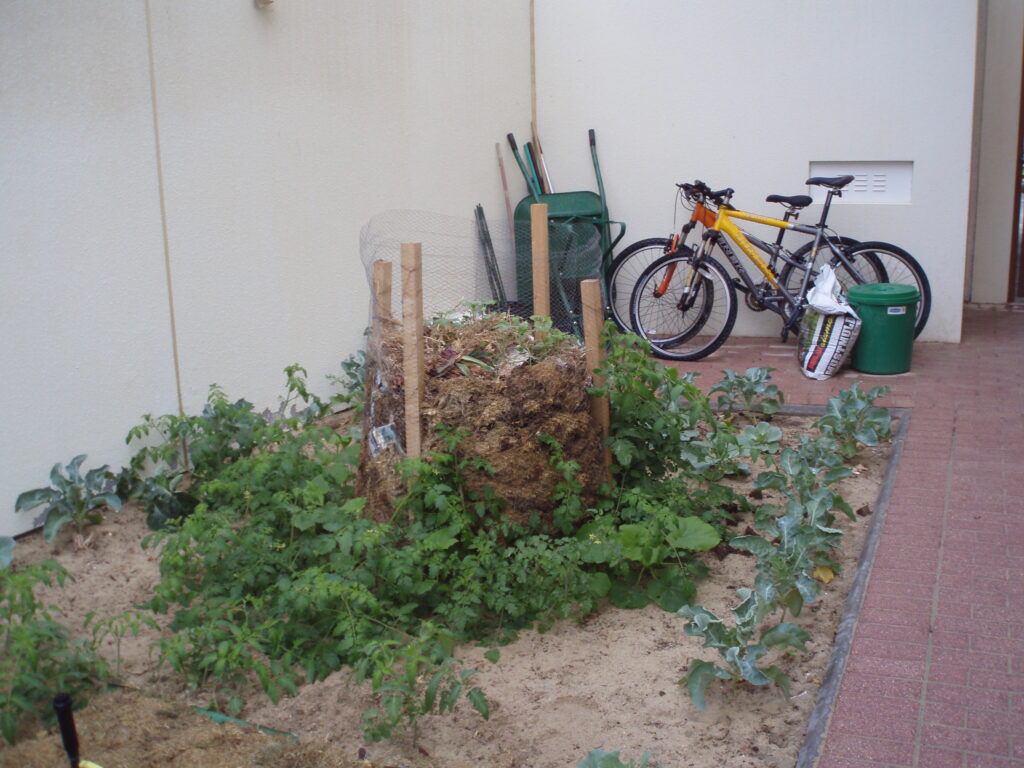
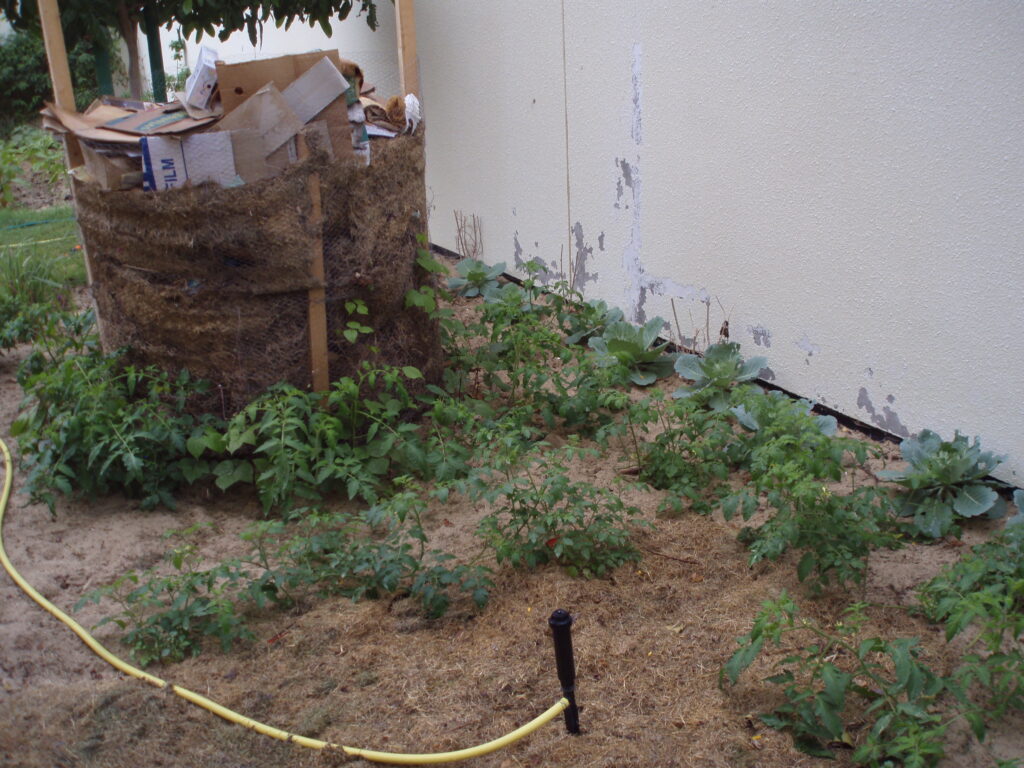
Another method that I really like for compost bins is to put it in the middle of a garden and plants whatever you like around it. In this case use four pieces of sturdy wood (2×2 or 2×4 work great.)
Surround the wood posts with hardware cloth, and voila! you have a compost bin. The obvious advantage to this bin is that the compost automatically fertilizes the plants surrounding it. You don’t turn the compost, and you don’t move it. You just keep adding your green and brown to the top (see below for what to put into compost bins.) Water the compost as you water your plants so that the water helps with the composting process.
What to Put in Your Compost Bin
For your bin to operate properly, you want two types of things in your compost bin. First, carbon (brown stuff) and second, nitrogen (green stuff.)
Keep all your kitchen scraps for your compost bin. dishwasher safe, handle, easy-to-clean, good seal. Here are two good choices: number 1 and number 2. You can see there are many choices for convenience as well as design.
Carbon Sources
Brown stuff like leaves or shredded paper is your carbon source. You can add cardboard of any sort. You can use any brown things from your garden such as dry palm branches and bark, or from your house such as cardboard, newspaper, or paper.
Nitrogen sources
Grass clippings or other green stuff, plus kitchen scraps, are your nitrogen source. I use all sorts of kitchen scraps like peelings, veggies that have gone bad, small pieces of paper that go between pieces of cheese, and scraps from plates. In gathering your kitchen scraps, some kind of collector for the kitchen counter is helpful. You can add coffee grounds, egg shells, and any other kind organic matter,
What Not to Put in Compost Bin
I don’t use any meats in the compost because I don’t want to attract raccoons. Needless to say, or maybe not, you don’t want to add any pieces of plastic. Try to pry those pesky little pieces of plastic labels that go on fruits and veggies in the grocery store. If you don’t, you will find them completely unchanged in your compost. Don’t ask me how I know.
Don’t put any diseased plants in the compost because you don’t want to spread it in the garden along with the compost. That includes plants covered in bugs. You don’t want to have insect eggs in the compost in concentrations.
Maintaining Your Compost Bin
If you can layer the brown and the green, that’s all to the good. I don’t usually get the brown and the green at the same time in my garden. The brown leaves come in the fall, the green come from lawn clippings and weeds I’ve pulled up in the garden and that comes in the summer. I’m not in a hurry for my compost so I just pile it all on and wait a long time and it turns into compost ready for the garden.
If you’re young, have lots of time, and want to increase the exercise benefit you get from the compost bin, turn occasionally to introduce air. Introducing air into the pile heats up the pile and composts the material faster. It also mixes up the green and brown which is good.
I don’t do this. My compost pile composts without it. But it does take my compost bin longer to create the compost. So you can decide if you want fast with more work, or slow and easy.