Building a Compost Bin

This post will give instructions for building a compost bin, and for what to put in your compost bin. Compost is the best method of fertilizing your garden, and you can create your own compost with materials you might otherwise have sent to the dump. For more on fertilizing your plants, check out my related post.

Photo shows a four-bay compost bin. My method is not meant to be beautiful.  It is meant to be cheap, easy, and  not requiring professional carpentry skills.
My method is not meant to be beautiful. It is meant to be cheap, easy, and not requiring professional carpentry skills.

If you want a beautiful compost bin, and you have the spare change to build it, you could try this method.

If you don’t have building skills, don’t have a lot of money, and are not that interested in building something beautiful just to keep your compost, it is easy to create a compost bin from mostly free materials.

What I did was pick up some pallets that were being given out free at a business near my home.  I had in mind to build a compost bin, and I passed by the sign that said “Free Pallets” so I stopped and picked up a few. 

Later when we got ready to build lea’s compost bin, I passed a pallet that was leaning up against a dumpster, so I snagged that one.  It is usually easy to find pallets at some location or another.  Just keep your eyes peeled, as Grandpa Bob used to say.

Select a Location to Build Your Compost Bin

Building your compost bin in the best spot will help guarantee success in the process. Select a location that is not in direct sun.  You want your compost to “cook” itself, not have the sun cook it for you. 

Also, choose a location where water doesn’t run on or under the bin. You are going to want to keep your compost bin wet but not sopping.

Compost Bin Materials

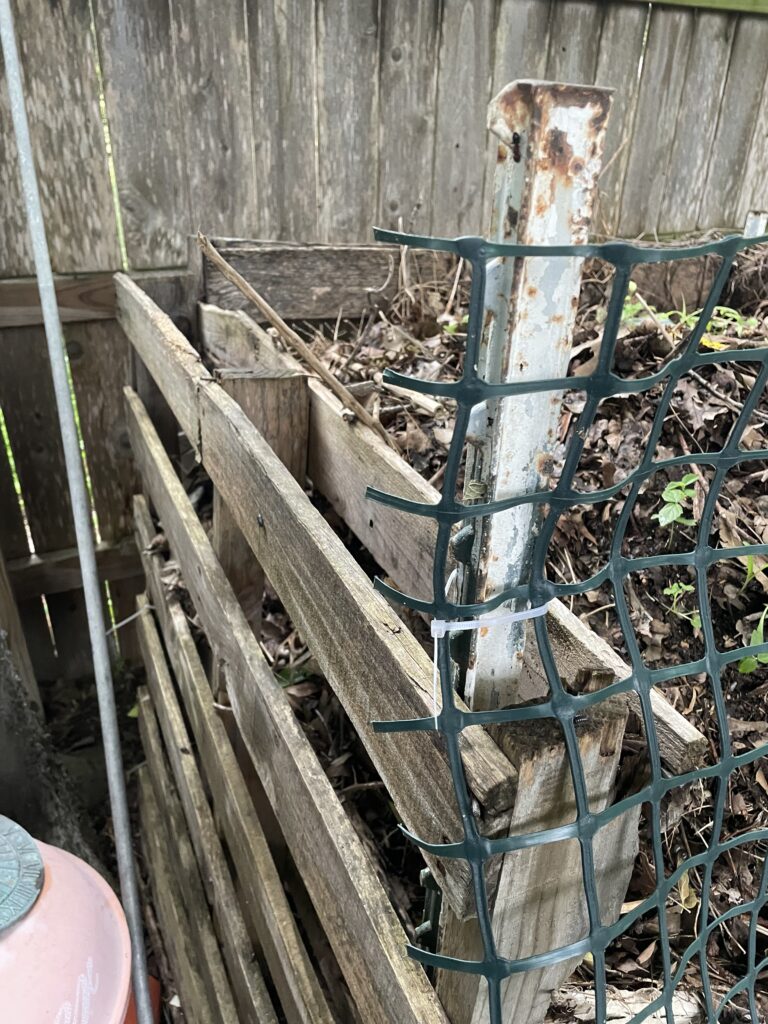
Before you can start building your compost bin, you will need to assemble the materials. For the first compost bin you will need 3 pallets, 2 t-posts, and 6 large cable ties. For each add-on bin, you will only need 2 pallets. Assemble the pallet by using t-posts from your local home improvement store or hardware store.  Even better, find some at an estate sale and you can save a lot of money. You will place the t-posts between the boards of the pallet which you have standing on its side.

Beginning to Build Your Compost Bin

The right and the left side of your compost bin will be each use 1 pallet, and the third pallet is for the back.  With the help of a buddy, set the pallets up starting with the left side.  You will notice that the pallet is two layers of wood, with a space between the layers.

This photo shows the space between top side of the pallet and the bottom side.  That is where we are going to put our t-post.
Notice the space between one side of the pallet and the other. That is where we are going to put our t-post.

Put a t-post at the front of the pallet in the space created by the top and the bottom of the pallet.  Hammer it into the ground with a sledge hammer. 

This photo shows the t-post  hammered into place between the layers of wood in the pallet.  This gives us the stability we need to keep the compost bin standing up.
The t-post is hammered into place between the layers of wood in the pallet. This gives us the stability we need to keep the compost bin standing up.

Put the back pallet in place, and use cable ties to join the side to the back. 

This photo shows the cables ties around the back of the pallets holding them together.
The cables ties around the back of the pallets holds them together.

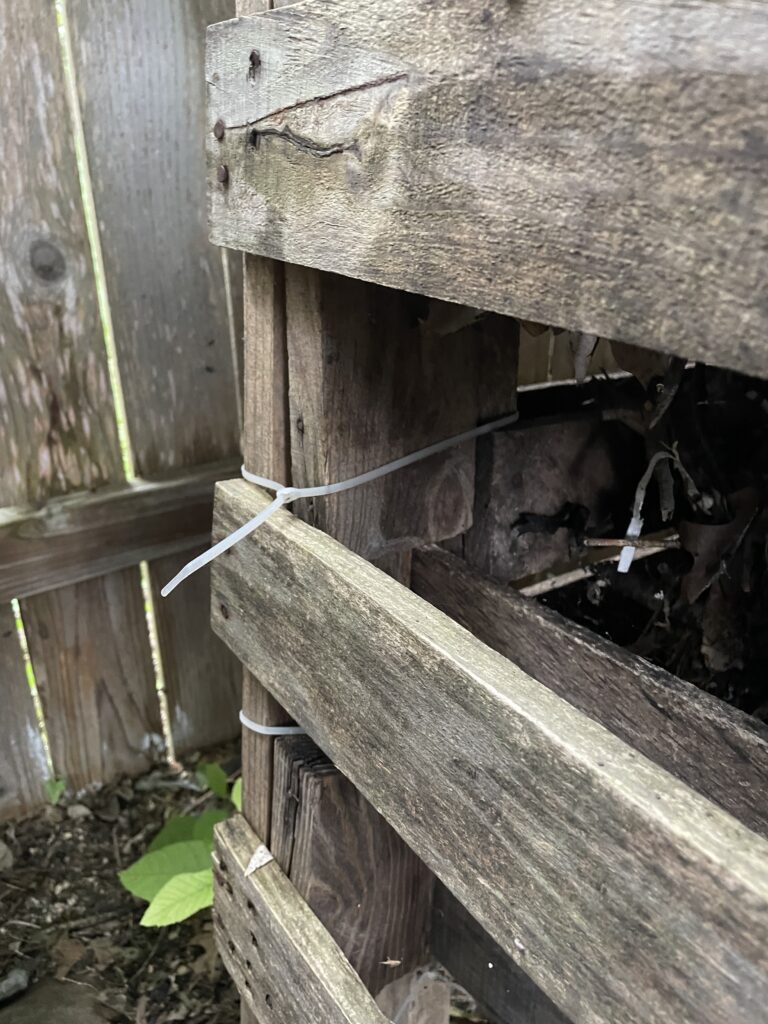
Next add the right side, making the U shape.  Join this pallet to the back with cable ties as well.  Then, put a t-post at the front of the right side.

If you are like my daddy and like to be really, super sure nothing is going to move, add another t-post to the right and left back corner.  I didn’t do this and my compost bins are quite stable just from the stability of the pallet itself.

If you want to add a second “bay” to your compost bin, you need only have 2 more pallets, and 1 more t-post, and 3 more cable ties.  Add the fourth pallet to the back and cable tie it to the back and the right side of the first bay.  This makes the back of the second bin.  Then cable tie the fifth pallet to the corner of the back of the second bay, and add the t-post inside the front of the new right side.  Your U now looks kind of like a W with flattened points. \_/\_/

The photo shows a shovel taking compost out of the bin.  Compost time!  Shoveling out the results of a year's worth of leaves, green clippings and kitchen waste.
Compost time! Shoveling out the results of a year’s worth of leaves, green clippings and kitchen waste.

Begin the Composting in Your Compost Bin

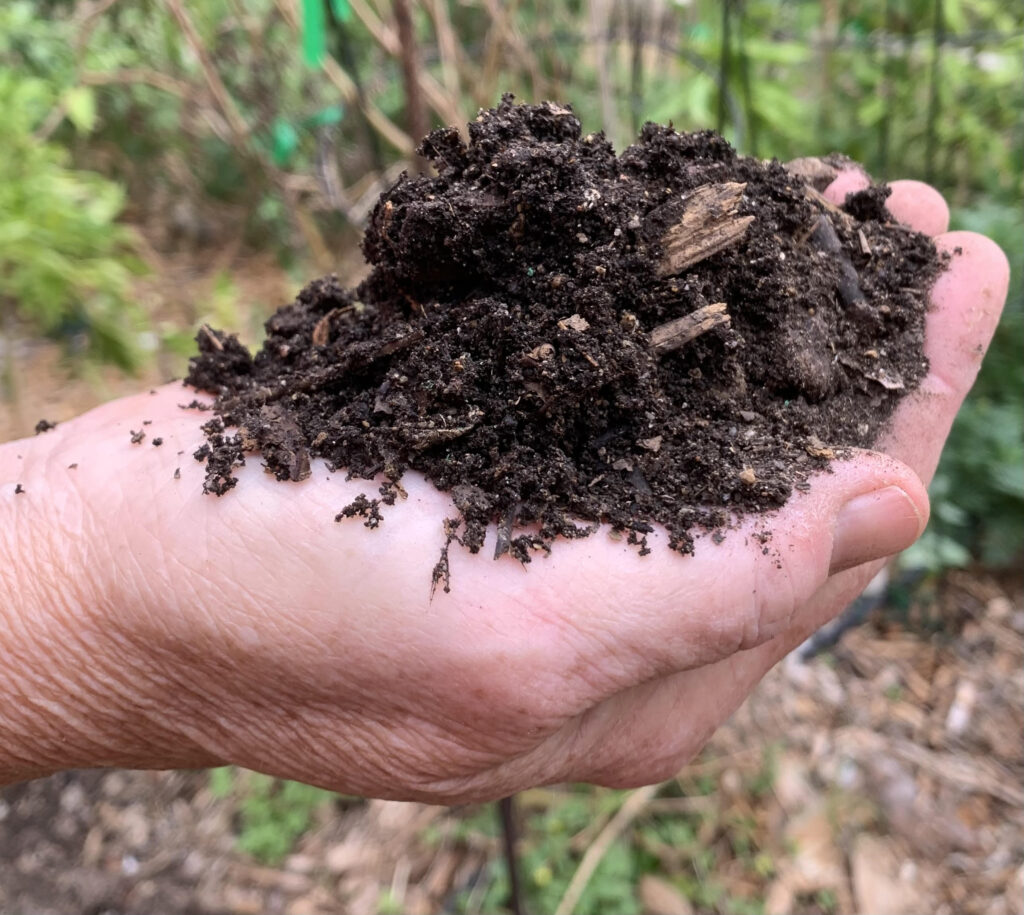
After you have filled the bin to the top, don’t add anything else and let it sit. If you are lazy, like me, just let it sit for a very long while, and when it is a fine consistency use it. 

I am now up to four bins to hold the contents of a year’s worth of vegetative matter from my beds and my yard.

How Many Bays Will You Build on Your Compost Bin?

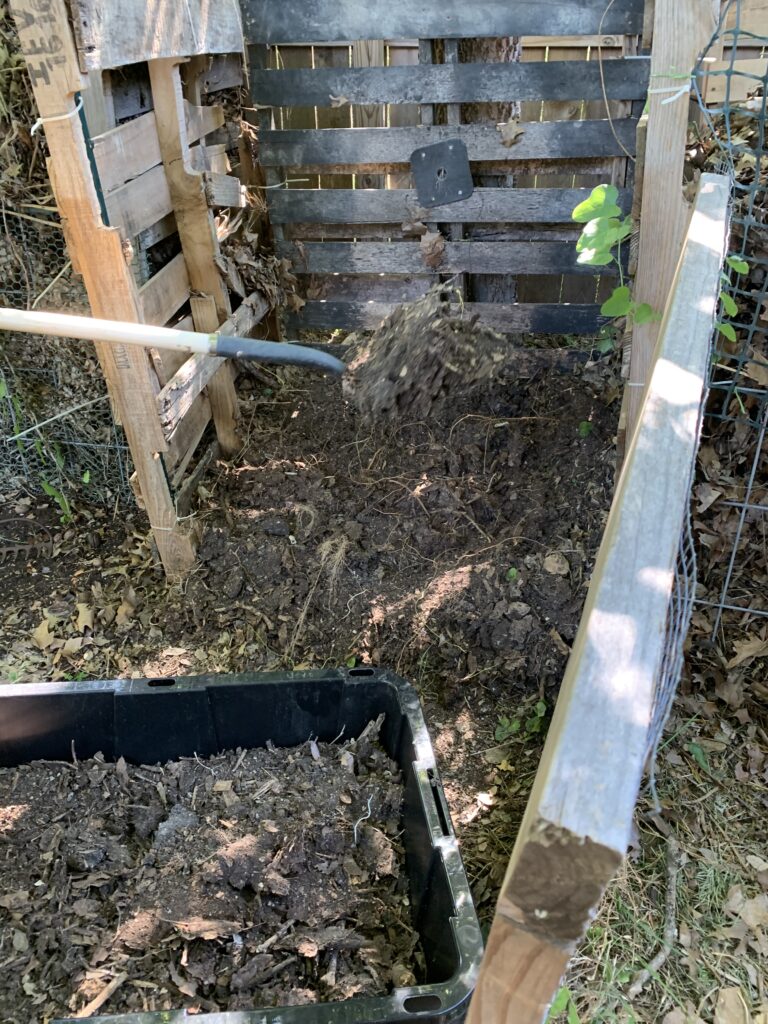
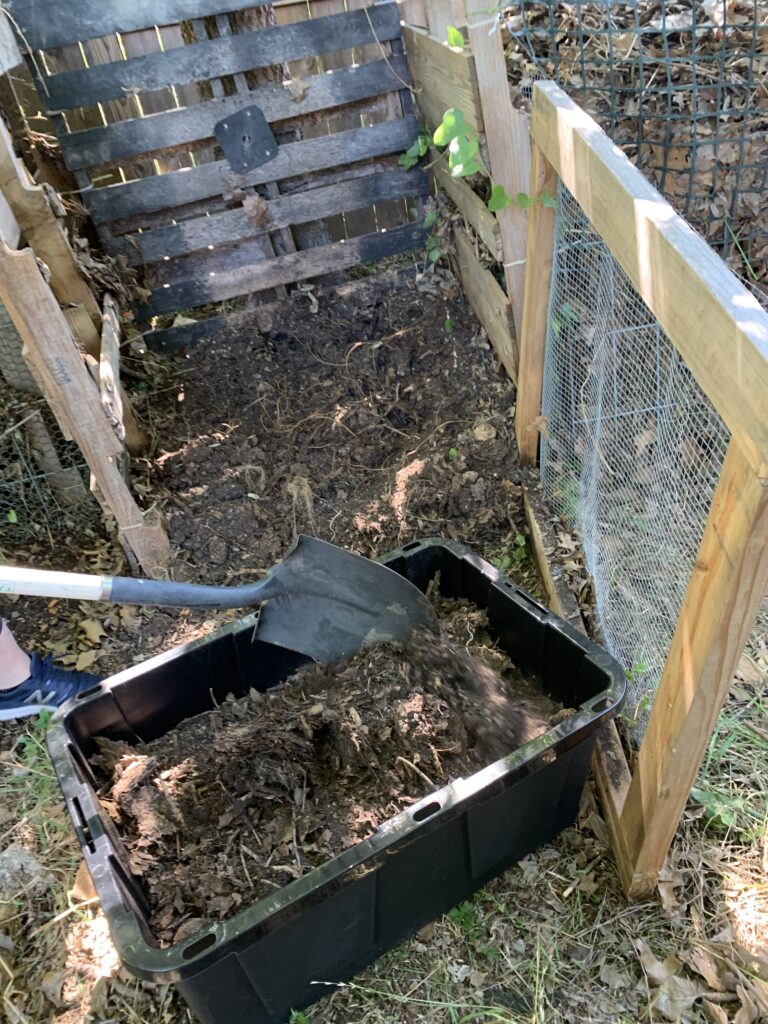
Two bays is really the minimum you want because when you get ready to shovel the decomposing stuff in the first side, having a place to shovel it into is a big help.  Periodically, you can turn your compost by shoveling the contents of the first bay into the second bay. 

If you are energetic, you can turn the compost more frequently and it will compost faster. If you are not so energetic, you can leave it to compost for a long time, and it will do the work itself. Even after you let it sit for a long time, you will likely need to move the upper materials to another bin, and find the better composted material on the bottom.

If the compost is not a fine enough consistency to suit you, shovel it again and let it sit again for a while. Continue shoveling it back and forth until it is the consistency you desire.  Then it is ready to go on your garden.

This photo shows the green layers (nitrogen sources) on top and the browner layers (carbon sources) on the bottom.  These will work together to create the compost over time.
You can see the green layers (nitrogen sources) on top and the browner layers (carbon sources) on the bottom. These will work together to create the compost over time.

Building your Compost Bin With a Door

You have several choices for how to create a door to keep all your goodies from falling out. You can skip this step if you don’t have enough compost matter to fall out the front.

Another Pallet

One is to use another pallet. Using cable ties to hold it on, you will have to remove the cable ties to empty or turn the bin.

A Wooden Frame

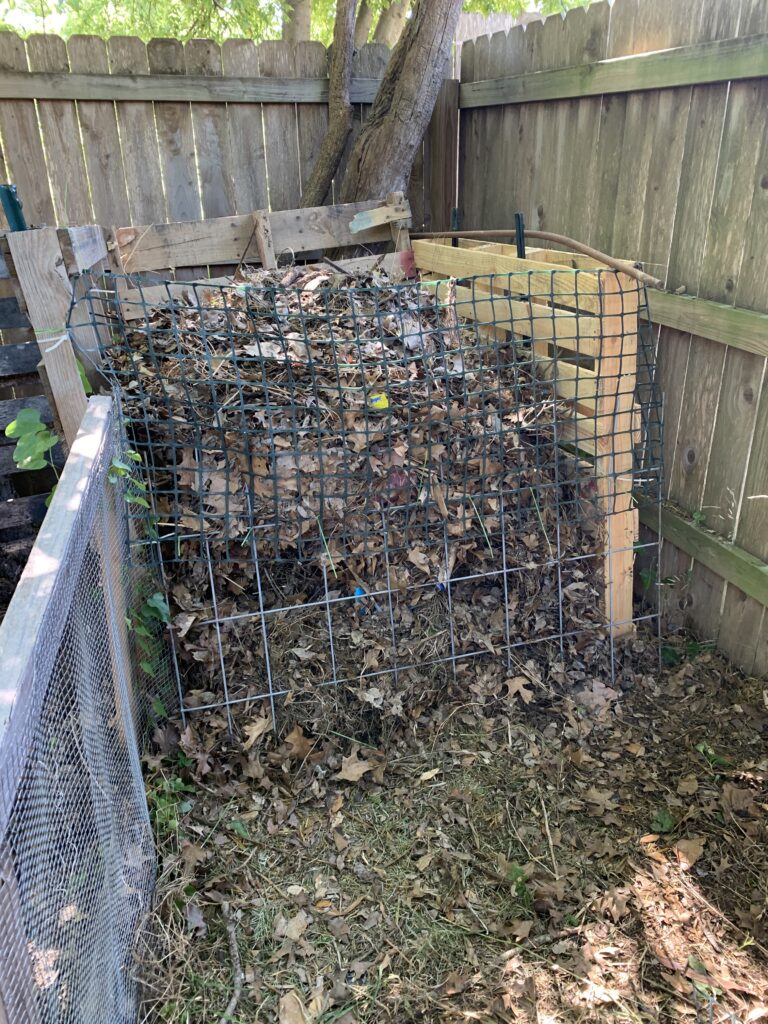
Another possibility to build a wooden frame, staple poultry netting or hardware cloth on it, and screw a hinge to the front of the pallet. Or attach it with cable ties as well. I like this option better because the smaller holes in the netting keeps more compost in.

This photo shows the wooden frame door described in the text.  lea is shoveling out finished compost from the bottom of the bin.
This photo shows the wooden frame door described in the text. lea is shoveling out finished compost from the bottom of the bin.

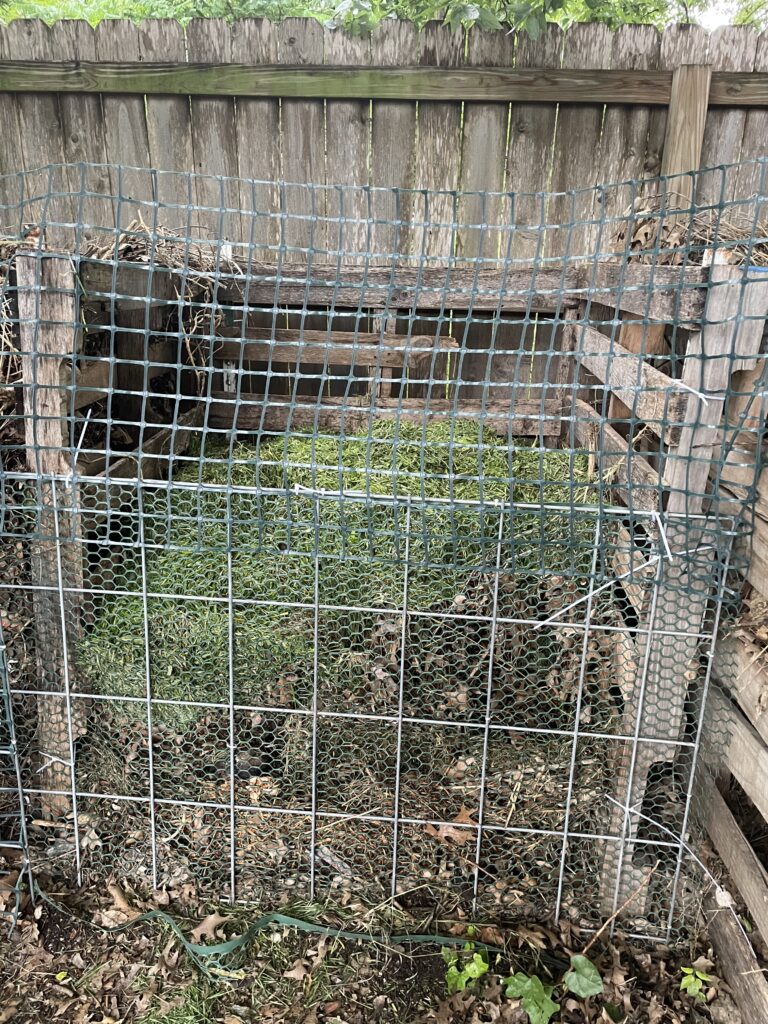
I was gifted some plastic netting so I used that, but it didn’t have enough structure, so I cable-tied it a leftover piece of livestock paneling. This makes it light weight but with structure and then also with small holes.

This  photo shows another door method.  It has plastic gardening webbing on the top and a part of a stock panel on the bottom.  Later, I combined the two so that the compost wouldn't spill out the bottom.
This photo shows another door method. It has plastic gardening webbing on the top and a part of a stock panel on the bottom. Later, I combined the two so that the compost wouldn’t spill out the bottom.

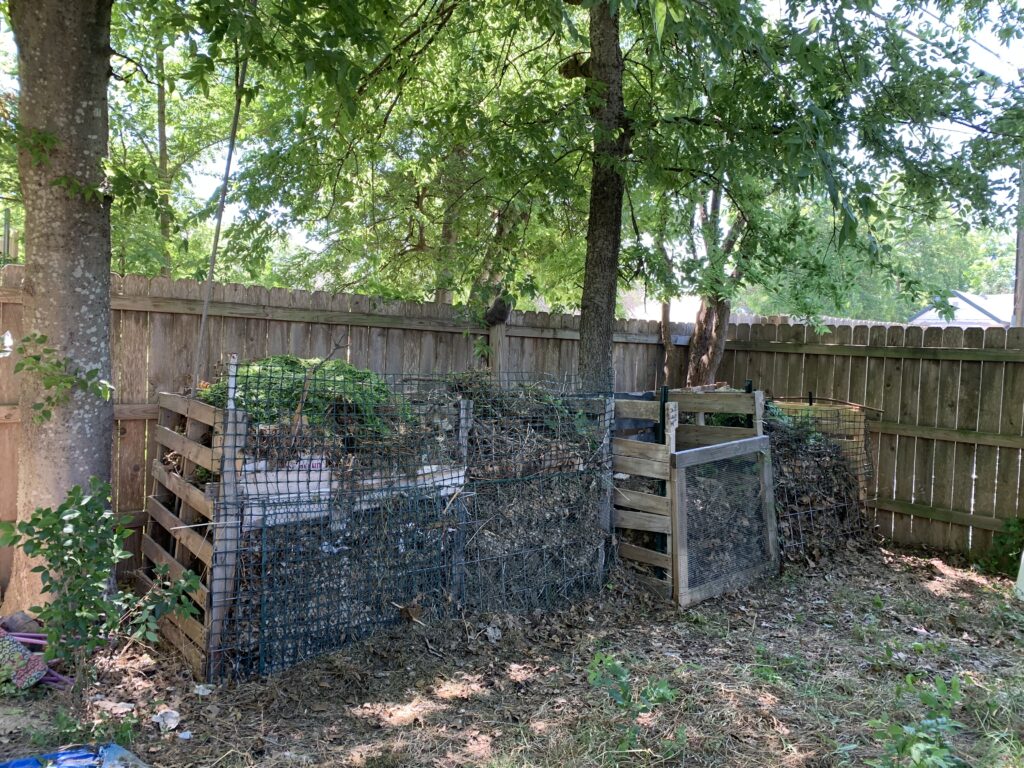
Different Doors on Different Bins

As you can see from the photos, I used both of the last two options on different bins. It ain’t pretty, but it works and it adheres to one of the principles of permaculture, which is to use onsite resources. If you have more of a desire to have a designer affect, I’m sure that there are many ways to accomplish the same goals and make it pretty.

Another Method of Building a Compost Bin

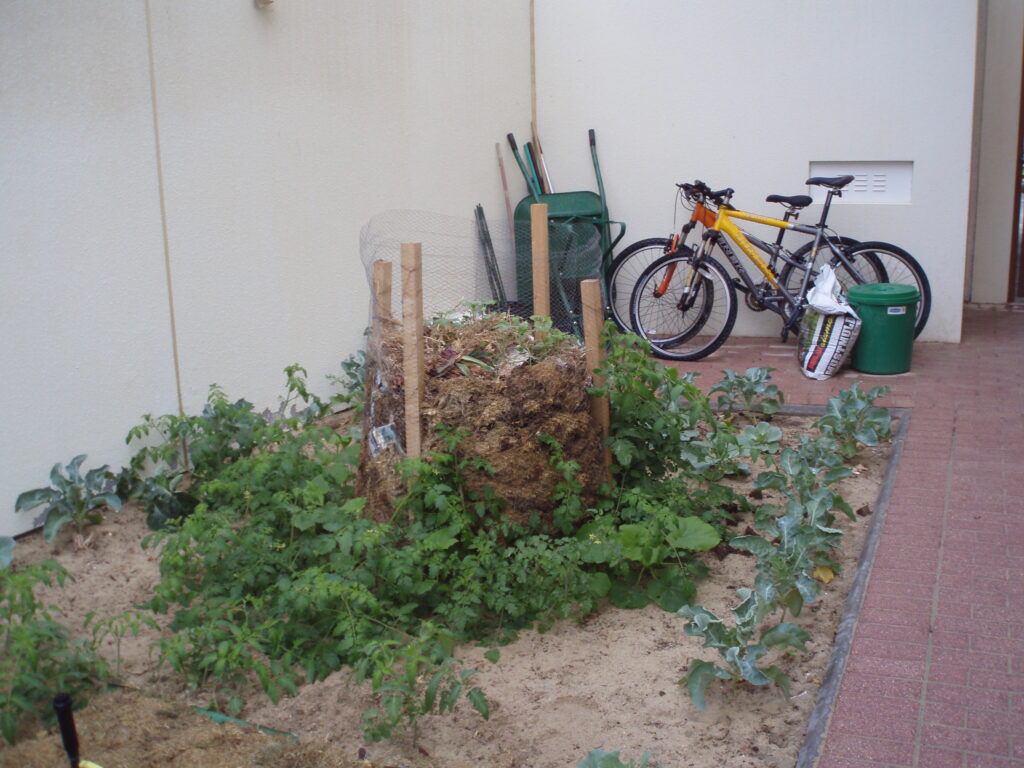
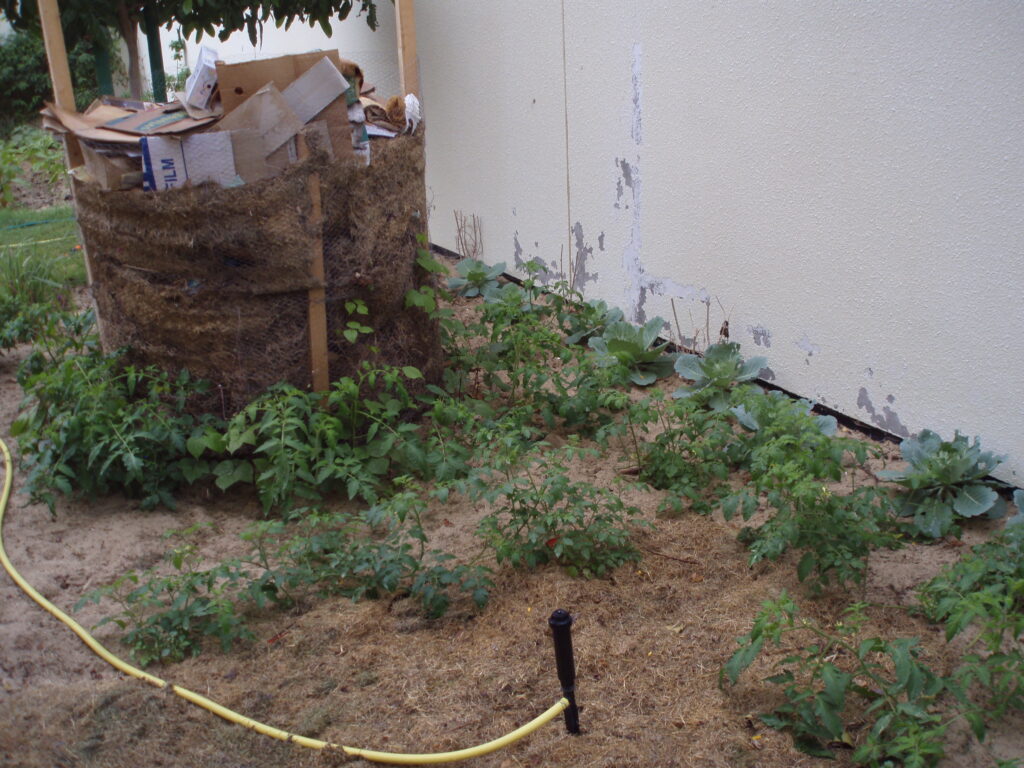
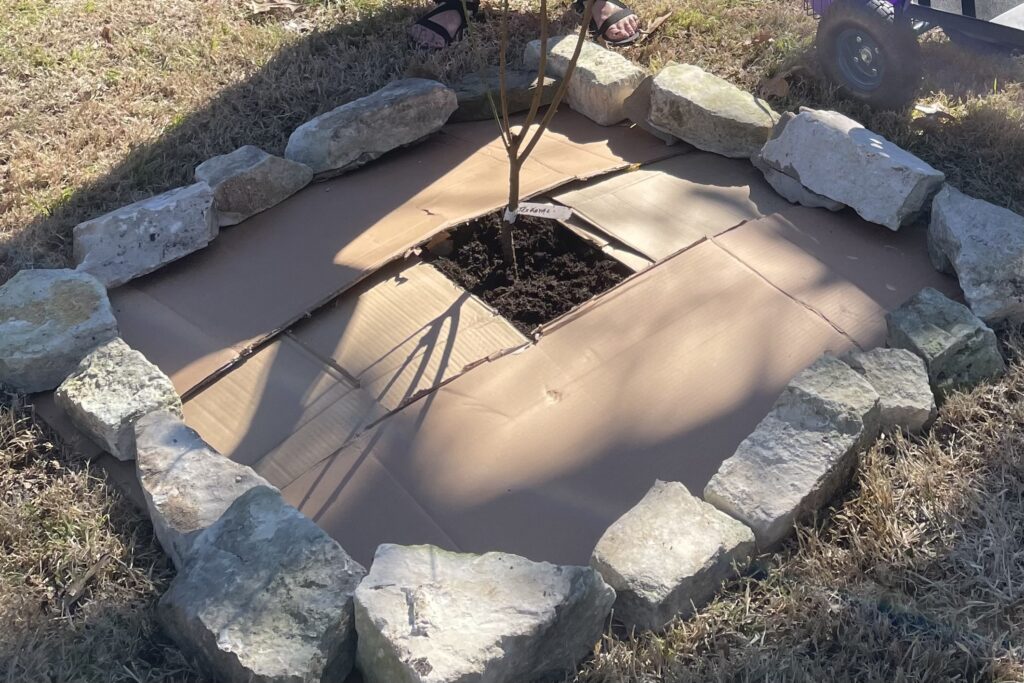
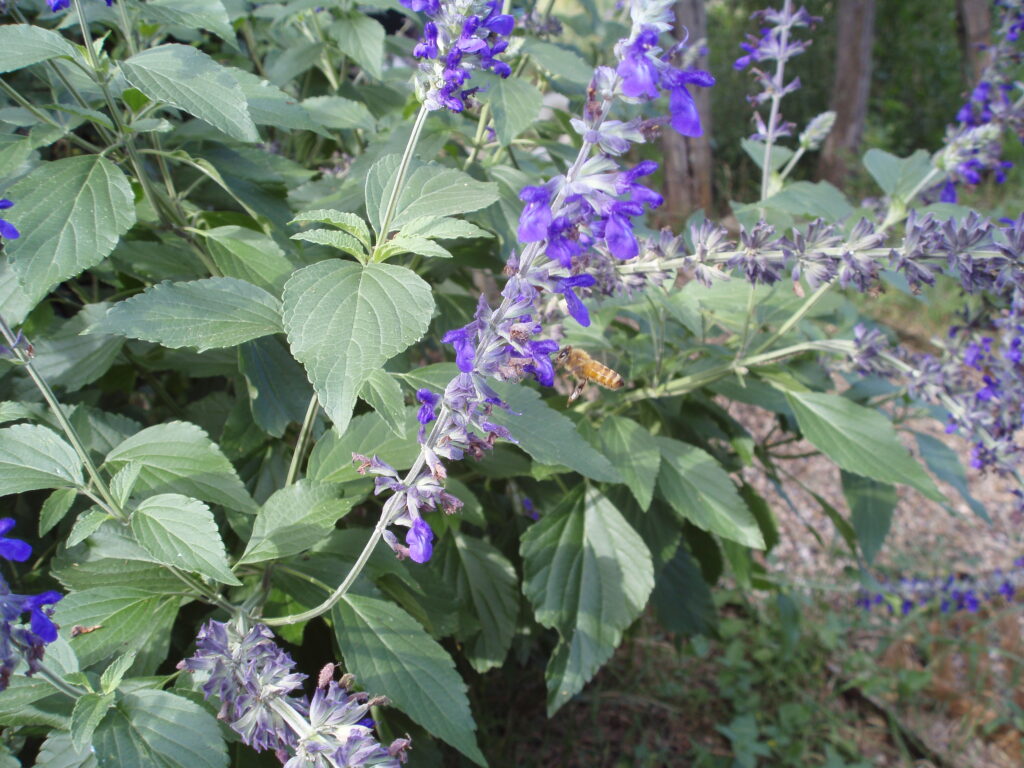
Another method that I really like for compost bins is to put it in the middle of a garden and plants whatever you like around it. In this case use four pieces of sturdy wood (2×2 or 2×4 work great.)

Surround the wood posts with hardware cloth, and voila! you have a compost bin. The obvious advantage to this bin is that the compost automatically fertilizes the plants surrounding it. You don’t turn the compost, and you don’t move it. You just keep adding your green and brown to the top (see below for what to put into compost bins.) Water the compost as you water your plants so that the water helps with the composting process.

This compost bin has tomatoes and cucumbers growing around it.  Some compost has sprouted o the top.
This compost bin (in the yard of our villa in Doha, Qatar) had tomatoes and cucumbers growing around it. Some compost has sprouted to the top.
Photo shows compost pile overed with cardboard boxes to keep critters out and shield the compost from the sun.  If you cover it, be sure to remember to remove the cardboard and water it anyway.
You can also cover the top or this kind of compost pile with cardboard boxes to keep critters out and shield the compost from the sun. If you cover it, be sure to remember to remove the cardboard and water it anyway.

What to Put in Your Compost Bin

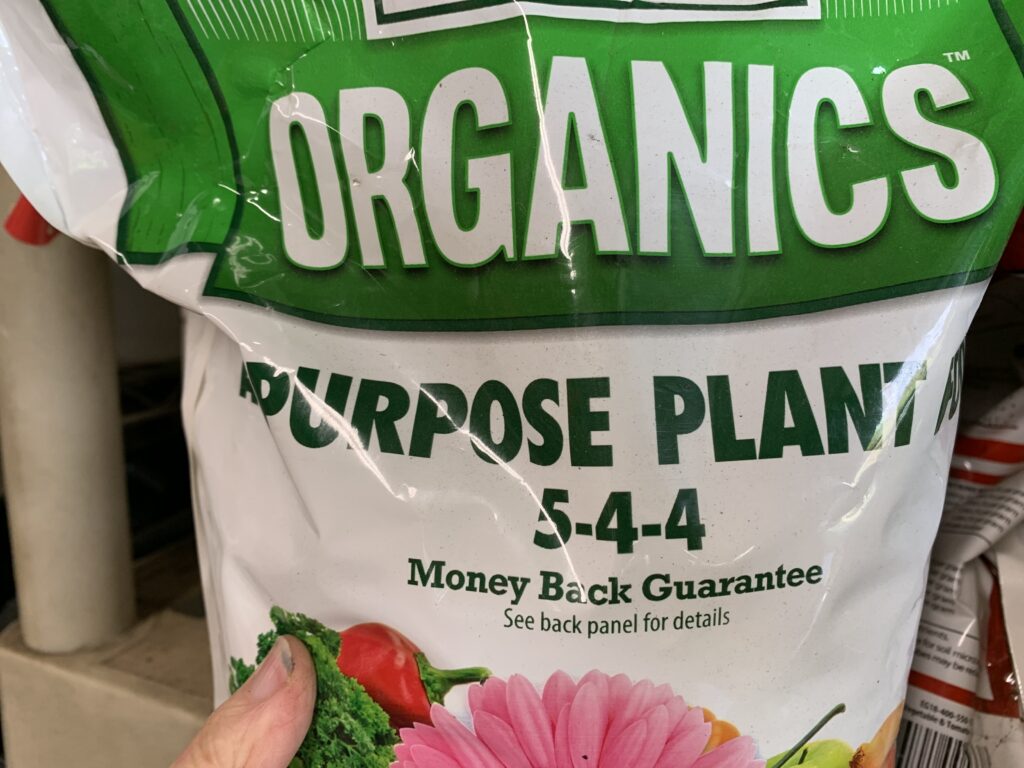
For your bin to operate properly, you want two types of things in your compost bin.  First, carbon (brown stuff) and second, nitrogen (green stuff.)

Keep all your kitchen scraps for your compost bin. dishwasher safe, handle, easy-to-clean, good seal. Here are two good choices: number 1 and number 2. You can see there are many choices for convenience as well as design.

Carbon Sources

Brown stuff like leaves or shredded paper is your carbon source.  You can add cardboard of any sort.  You can use any brown things from your garden such as dry palm branches and bark, or from your house such as cardboard, newspaper, or paper.

Nitrogen sources

Grass clippings or other green stuff, plus kitchen scraps, are your nitrogen source.  I use all sorts of kitchen scraps like peelings, veggies that have gone bad, small pieces of paper that go between pieces of cheese, and scraps from plates.  In gathering your kitchen scraps, some kind of collector for the kitchen counter is helpful.  You can add coffee grounds, egg shells, and any other kind organic matter,

What Not to Put in Compost Bin

I don’t use any meats in the compost because I don’t want to attract raccoons. Needless to say, or maybe not, you don’t want to add any pieces of plastic.  Try to pry those pesky little pieces of plastic labels that go on fruits and veggies in the grocery store.  If you don’t, you will find them completely unchanged in your compost.  Don’t ask me how I know. 

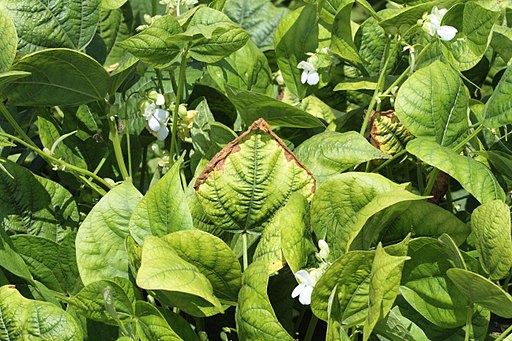
Don’t put any diseased plants in the compost because you don’t want to spread it in the garden along with the compost.  That includes plants covered in bugs.  You don’t want to have insect eggs in the compost in concentrations.

Maintaining Your Compost Bin

If you can layer the brown and the green, that’s all to the good.  I don’t usually get the brown and the green at the same time in my garden.  The brown leaves come in the fall, the green come from lawn clippings and weeds I’ve pulled up in the garden and that comes in the summer.  I’m not in a hurry for my compost so I just pile it all on and wait a long time and it turns into compost ready for the garden.

If you’re young, have lots of time, and want to increase the exercise benefit you get from the compost bin, turn occasionally to introduce air.  Introducing air into the pile heats up the pile and composts the material faster.  It also mixes up the green and brown which is good.

I don’t do this.  My compost pile composts without it.  But it does take my compost bin longer to create the compost.  So you can decide if you want fast with more work, or slow and easy.

Potting Seedlings Up

What is “Potting Seedlings Up”?

In the last post, we talked about how to plant seeds to germinate them and this post we will address potting seedlings up. When the seedlings get big enough, they are ready to move to a bigger environment. That’s called “potting up.” The following tips lead you to successfully move your baby seedlings into a slightly bigger home.

This photo is of two tomato seedlings growing out of a peat pellet.  This tomato seedling has grown its "true leaves".  The first leaves are rounded, but the true leaves have the indented leaves that look like a tomato plant.  Now it's time for potting this seedling up.
This tomato seedling has grown its “true leaves”. The first leaves are rounded, but the true leaves have the indented leaves that look like a tomato plant. Now it’s time to pot this seedling up.

[This post contains affiliate links. That means that if you make a purchase after clicking on a link I may earn a small commission at no extra cost to you. For more information, click here.]

Wait for True Leaves Before Potting Seedlings Up

After what seems an eternity of your eyes glued to the potting pellet or tray, you will finally see a tad of green. The first couple of leaves you see emerge from the soil come from the nutrients in the seed itself, and are usually rounded. Soon the plant will put on the next set of leaves which are bigger and stronger. These are called “true leaves”. 

When the seedlings start to put on their true leaves, it is time to begin potting seedlings up. You want to move them up to a 3- or 4-inch pot so that they can grow into a good size before planting out in the garden. Don’t wait too long. If you wait too long to pot the seedlings up, they may be permanently stunted and not grow into a healthy plant once you put it in the garden. As in many things in gardening, the “Goldilocks rule” applies. Not too little, not too big. Just right.

The writer of gardenmyths.com argues that when potting up seedlings you should use the biggest pot you can. That may be true, but I have a limited budget for potting soil, and limited space for keeping my seedlings. What I would take away from his advice is that you should never let a plant become root bound because it is going to affect the health of the plant whenever you move it to the garden.

Fill Your Pots with Potting Soil 

This photo shows a flat of 3' pots filled with potting soil.  They are ready to pot up the seedlings.
A flat of 3′ pots filled with potting soil. They are ready to pot up the seedlings.

When potting seedlings up, use a good, organic soil mix. Fill your pots to within 1/2 inch of the top. Don’t fill it too high, because when you water, you want the water to pool at the top just before it goes into the soil. If you fill it too high, the water will slide off. Shake the pots to settle the soil, and water thoroughly.

Make a hole the size of the seedling’s root system which is likely the size of the hole it has been growing in.  Depending on the size of the seedlings’ root ball, one or two fingers work fine if you don’t have another tools.

This photo shows a 3" pot of soil with two fingers pushing into it.  Push two of your fingers into the soil to make a hole to pot up little seedling.
Push two of your fingers into the soil to make a hole to pot up little seedling.

Remove the seedling from the tray or wrapper. If you have used a peat pellet, gently pull off the wrapper the seedling has been growing in.. 

This photo is shows the pulling of the wrapper off of a peat pellet before it's transferred to a 3" pot.
Pull the wrapper off of a peat pellet before transferring to a 3″ pot.
This photo shows a fork easily lifting a seedling from the cell of the tray where it was started.  This is the next step of potting the seedling up.
A fork easily lifts a seedling from the cell of the tray where it was started.

If your seedlings have been growing in a tray, a fork is a good tool to remove them from the cells of the tray. Gently lift them out of the seedling cells.

This photo shows potting up a seedling.  This tomato seedling is being held by the "true leaves". 
 When potting up a seedling, hold it by the true leaves, and place the roots into the hole you've made.  Then, firm the soil gently.  These healthy roots need a very deep hole.
When potting up seedlings, hold it by the true leaves, and place the roots into the hole you’ve made. Then, firm the soil gently. These healthy roots need a very deep hole.

The physical act of potting seedlings up requires you to treat those darlin’ babies just like you would real babies:  very, very gently. 

Don’t Pick Up Your Seedlings by the Stem When Potting Up

Unless you are very, very dexterous, it is almost impossible to pick it up by the stem and not damage it.  Their lifeline to the world is their little stem, and it is very easy to damage it. That’s where the seedling gets all its water and nutrients to grow bigger, so damaging it may be a death sentence.   When moving the seedling, hold on the biggest leaf (hopefully a true leaf). 

Place your little seedling gently in the hole you have made in your new pot. 

This photo shows three fingers firming the soil gently around the baby seedling.  This finishes the potting up the baby seedling.
Firm the soil gently to finish potting up the baby seedling.

Planting Depth

Most seedlings should be planted even with the soil line of the location they have been growing.  The most notable exception is tomatoes which should always be planted as deep as possible. The tomato will grow roots along the stem. Other plants don’t grow roots along the stem and planting them too deep can cause the stem to rot. Again, a death sentence.

Press the potting soil against the seedling firmly but not too hard.  The idea is to let the roots be surrounded by soil and not air pockets.

Then water gently and thoroughly, which should also serve to remove any remaining air pockets.  There you go!  A genuine potted up seedling!

Make Changes Slowly

Now that you have the seedling potted up, the temptation is to run the pots outside into the sun. Unless you have been growing the seedling outdoors in the sun, this is not a good idea.

Never change the growing environment of the newly potted-up seedlings too rapidly.  If your seedlings have been growing in the shade or under a grow light, give them a dose at a time of pure sunlight.  Of course, if this is a shade-loving plant, try to move it to the shade in the early days.  A dose at a time is also important if the temperature is going to very different for them than which they have been growing. 

Keep a close eye on the babies at this stage because they need to recover from the shock of transplanting.  Sunlight and temperature can be an additional stressor for the babies, and may make the difference between the baby growing into a toddler or ending its life in the compost pile.

In another month or so, it will be time to put this wonderfully grown-from-seed plant into the garden, but that is another story.

Seeds Grow Best with These Tips

Lots of seeds grow easily into seedlings. However, before you stick seeds in the dirt, knowing some important tips will increase your success rate .

Well, for most folks. My grandson has had great success taking nasturtium seeds and dropping them throughout the garden. Then, the family is surprised with happy orange blooms in the least expected places.

Growing from seeds is an inexpensive way to have lots of plants for your garden.  This photo shows tomato seeds in a small, pointed dish being poured onto a ready peat pellet.
Planting seeds is an inexpensive way to have lots of plants for your garden.

[This post contains affiliate links. That means that if you make a purchase after clicking on a link I may earn a small commission at no extra cost to you. For more information, click here.]

Seeds Grow Best Knowing What, When, and How

For the rest of us ordinary mortals, when we want to grow a plant from seed, there are the what, when, and how to consider. For instance, when should I plant the seed? Next, where should I plant the seed? Finally, how do I plant it?

When to Plant a Seed

Seeds can be started almost any time of year, depending on the plant’s preferences for the season it likes to grow. You can generally find the information for the plant’s preferences on the seed packet, but as always I recommend checking the specifics for your area by searching for your county + extension office planting calendar (ex: Williamson county extension office planting calendar).

Seeds Grown Indoors

A popular time to start seeds is indoors when it is too cold for outdoor planting. If you are planting seeds that need a lot of sun, make sure you have a lot of light available or the seedlings will become spindly. A very bright sunny window will work, or you can use a plant light if your seeds need additional light. Here’s a link to a light I have tried and like.

Late winter is the time to plant your summer seeds.  Find your last average freeze date, and count back six to eight weeks.  That’s the time to plant your seeds for tomatoes, peppers, and other tender plants that need the shoulder season to produce before it gets too hot.

What’s a Last Freeze Date? 

That is the average date that you experience the last freeze in your area.  You can find that out by checking out this map from the National Oceanic and Atmospheric Administration (NOAA).  The map has many dots for each location.  You can enter your zip code to find your exact location.  In Taylor, where I live, the average last freeze date is March 8.  Now knowing anything about weather, which we all do, we know that it is very unpredictable.  You can plant after March 8, but be ready to protect your tender plants in case of an unusually late freeze. 

Grow Seeds in Pots vs. Direct Seeding

I like growing plants from seeds in some small container before I plant it in the ground.  I feel like I can help the plant with a better start when I can watch it carefully through its baby stage. 

Picture of a peat pellet showing wrapper and a label that says "Black Krim Tomato".  Seeds grown in a peat pellet can go directly into a 3" pot.  All you need to do is remove the wrapper on the pellet, and place the seedling into a bigger pot.
Seeds grown in a peat pellet can go directly into a 3″ pot. All you need to do is remove the wrapper on the pellet, and place the seedling into a bigger pot.

Some seeds, however, shouldn’t be started as transplants. Usually, the reason for this is that they grow so fast, they outgrow any container you choose.  Another reason may be because the process of transplanting may damage the roots, even if only slightly, and then the transplant dies. 

This photo is of a squash plant with a small squash fruit growing.  Squash plants usually grow best  when seeds grow directly in the ground.  They grow from big seeds, and they grow fast so transplanting is not easy.
Squash plants usually grow best directly seeded into the ground. They grow from big seeds, and they grow fast so transplanting is not easy.

Examples of plants that should be directly seeded into the garden are squash, pumpkins, beans, and cucumbers.  You will find seedlings of all these types of plants at your big box stores, but I recommend to pass them by.  They will not perform as well as if you had directly seeded them into the garden. Get yourself some seeds and plant in your garden directly.

What Makes Seeds Grow

The what of growing seed includes the plant variety, how easily a plant will germinate, is light required for germination, and do the plants need a cold or freezing period to germinate.

Variety Determines Success

Seeds grow best if they are matched to your environment. That means you should use varieties that succeed well in your plant zones.  More on that topic can be found in the post here. Here is the Texas A&M extension website for more information on good vegetable varieties for Texas. As mentioned above, You can put in your county and get a list tailored to your climate.

Picture is of a Baker Creek Heirloom Seeds seed packet labeled "Black Krim Tomato".  Black Krim Tomatoes are suggested by A&M Extension Service.  Grow seeds of these tomatoes for successful harvest.  And they're tasty too!
Black Krim Tomatoes are suggested by A&M Extension Service. Grow seeds of these tomatoes for successful harvest. And they’re tasty too!

Grow Seeds that are Easy Germinators

Some plants are very fussy in their germination needs and some are not.  It’d be good to start your exploration into seed planting by experimenting with easy to grow seeds, such as zinnias, nasturtiums, broccoli and even tomatoes.  After you succeed with a few easier ones, you can stretch your horizons into the fussy seeds.

Grow Seeds That Require Light

Some seeds require light to germinate. Most of these are probably not in the “easy germinators” category, but it is important to look for this requirement on the seed packet (see below). These seeds should be carefully left uncovered, and watered gently to be sure the soil doesn’t wash over the seed and keep light from getting to the seed.

Freeze Seeds That Need It

Some seeds need to be frozen or at least refrigerated, before they can sprout (cold stratification).  Although I was a bit leery of freezing seeds in the early days, I was convinced to try it after I heard that the international seed bank freezes all its seeds.

Planting the Seeds

After all those considerations, it is finally time to get those seeds in some potting medium. (The next post will talk about what planting medium you might want to choose. For now, I am going to use peat pellets as an example.)

Planting Directions

Look on the back of your seed package to find valuable planting information, such as when to plant that particular plant, the depth to plant the seed, and the spacing of the transplants.  Some companies leave the planting information out, so you can check on their website or other websites to find the information you need. 

Photo is of the back side of the seed packet.  The instructions say how long it takes to sprout, the ideal temperature, the seed depth, plant spacing, frost hardiness and sun required.  

These planting instructions say to plant these tomato seeds at 1/8 inch.  That means 1/8 inch of soil covers the seed which is not much!  Grow seeds following these directions for successful germination.
Notice these planting instructions say to plant these tomato seeds at 1/8 inch. That means 1/8 inch of soil covers the seed which is not much! Grow seeds following these directions for successful germination.

Usually the seed package tells you the ideal planting depth for the seeds.  This may vary from ¼ to 1 inch deep.  Some seeds even say to lay the seed on top of the soil because those seeds need light to germinate.  The depth is not particularly fussy most times.  Try to stay close.  Also, I have heard many experts say that you can use the size of the seed as a guide, plant the seed as deep as it is big, if you can’t find the planting depth on the packet or other means.

Assemble Tools to Grow Seeds

Assemble your planting tools. A small dish to hold the seeds makes it easier, and a pointy dish can be used to pour seeds onto the potting medium. I often use toothpicks to pick up the seeds. This season I decided to use peat pellets. They begin flat, and when soaked in water swell up to the perfect size to start seeds.

This photo shows the tools you need to grow seeds are simple: a little dish or bowl, the planting medium and tools to measure the depth of the planting. a little dish or bowl, the planting medium and tools to measure the depth of the planting.
The tools you need to grow seeds are simple: a little dish or bowl, the planting medium and tools to measure the depth of the planting.

A dibble with measurements helps make the correct depth hole in the potting medium.

This picture is of a dibble.  This simple dibble has measurements  along the conical end.  Planting at the correct depth allows your seeds to grow better.  This one came free with the peat pellet order.
This simple dibble has measurements (if you can read them–try zooming in) along the conical end. Planting at the correct depth allows your seeds to grow better. This one came free with the peat pellet order.

Putting the Seeds in the Soil

Finally, we are ready to get those seeds in the soil! How will we do that?

Picking up the Seeds

Toothpicks are great for picking up seeds. Just dip the toothpick into water, and the seed is picked up by the surface tension. Then you can place the seed easily in the potting medium.

This photo is of a toothpick holding a seed.  Dipping the tooth pick in a drop of water allows you pick up one seed to grow at a time.  The reason is the surface tension of the water.
Dipping the tooth pick in a drop of water allows you pick up one seed to grow at a time. The reason is the surface tension of the water.

Grow Seeds at Correct Depth

Then, add your seed. I like to push the seed down to the required depth with my toothpick. Or you can use your dibble to create a hole, and then drop the seeds in. I usually put 2 seeds in each pellet or space because seeds are cheaper than the peat pellet, as well as my time. All seeds do not germinate. Two seeds doubles my chances of getting a seedling.

This photo is of a seed on a toothpick being transferred to a peat pellet.  Once you have the seed picked up by the wetted toothpick, you can easily transfer the seed to the soil.  Then you can push the seed under the soil to the correct depth and your seed is ready to grow.
Once you have the seed picked up by the wetted toothpick, you can easily transfer the seed to the soil. Then you can push the seed under the soil to the correct depth and your seed is ready to grow.

Seeds Grow Best in These Environments

Seeds need a good environment after they are planted. As mentioned above, you need lots of light. Let’s take a look at some of the other important factors.

Keep your Seeds Wet

After the seed is at the correct depth, and covered with soil, it is important to keep the planting medium wet until the seedling appears. Potting medium can crust over if it dries out  and some seedlings have trouble getting through the crust.

Keep Your Seeds Ventilated

Put a little fan near your seedling pots or pellets. This keeps the fungus that causes “damping off” from killing your seedlings. The “damping off” fungus attacks the seedling at the stem, and then the seedling falls over and dies.

Next Steps

In about six to eight weeks, your little seedling will have grown into a reasonable size for the next steps: potting up into a 3″ pot or planting into the ground. We’ll talk about those steps in the next post.

Fruit Tree Success with Eight Tips

Photo shows a peach bloom.  Fruit trees are a welcome addition to your garden.  These tips will help you to succeed with your fruit trees.
Fruit trees are a welcome addition to your garden. These tips will help you to succeed with your fruit trees.

A new fruit tree will succeed best if you follow these eight tips.

When my daughter, lea, was on her way home from Qatar, a group of her dearest friends wanted to send her a going away present. They thought up the idea of sending her a fruit tree.  That was a wonderful idea, and just perfect for lea since she already had in mind putting in gardens at her house. Plus, she hankered for vegetables and fruits.

Tip #1: Your Hardiness Zone Affects Your Fruit Tree

To choose the right tree that would have a chance to thrive here in at her house in Zone 8b, we had to start with a tree that liked Zone 8b.  There are zones for every part of the United States and these zones basically tell you how cold it’s going to be in that neck of the woods. 

This image is of the USDA Hardiness Zone Map.  The zones show the minimum winter temperature.  See link below for an interactive version from the USDA.
The USDA Hardiness Zone Map. The zones show the minimum winter temperature. See link below for an interactive version from the USDA.

Or if you prefer the USDA wording: “The USDA Plant Hardiness Zone Map is the standard by which gardeners and growers can determine which plants are most likely to thrive at a location. The map is based on the average annual minimum winter temperature.”

If that made your head hurt, here’s that same map that you can use interactively and can tell you what your zone is. This map shows that lea’s house is in Zone 8b:  15-20° F is our average annual minimum by winter temperature.

Tip 2: Your Heat Zone Affects Your Fruit Tree

Of course, the problem for most of us Texans is how hot it’s going to be, but never fear, there is a heat zone map too.  

This image shows the Heat Zone map for Texas.  There are twelve heat zones, and the higher the numer, the hotter it is.
Heat Zone map for Texas. There are twelve heat zones, and the higher the numer, the hotter it is.

Click on this map to interactively find your heat zone. The map shows that lea’s house is in Heat Zone 9.  That means we have 121 – 150 days over 86°F.  Whew!  No wonder I’ve been so hot!

Now, if y’all have come back after playing with those interactive maps, I’ll continue with the story.

Tip 3: Make Sure Your Fruit Tree Fits Your Particular Location

You can find the cold hardiness zone for some plants on the label or in the catalog, especially fruit trees. The problem is that the idea of a heat zone is a relatively new concept.

Therefore, most fruit trees do not have labels about what zone the poor little darlin’ tree wants to live in.  So, the best advice there is to pick a tree from a nursery at least in the state of Texas, not Maine or North Dakota.  If you can go to a local nursery and get advice from an expert there, that would be good.  Texas A&M extension service provides lists of good varieties for different parts of Texas. Here’s a list for Travis County (Central Texas).

Also, check with other gardeners about fruit trees that thrive near you. Go on walks or go to botanical centers near you and see what fruit trees are thriving. I love to use the Seek app by iNaturalist to identify the interesting plants we find on our morning walks.

We chose lea’s peach tree from Womack Nursery, which is a lovely, family-owned nursery with all kinds of fruit trees located in DeLeon, Texas.

I don’t recommend going to a big box store and picking out a tree that they have by the dozens on a rack.  They might grow, and they might not, but your chances improve with local advice.

Tip #4: Fruit Trees Have Chilling Hours

lea’s friends decided they wanted to send her a peach tree, so the next thing they needed to know was about chilling hours.  Chilling hours are a lot like Goldilocks.  You don’t want too high a number, and you don’t want too low a number, you want a number that is just right.

The image is a storybook page of  Goldilocks getting ready to taste the porridge of the three bears.  We are just like Goldilocks.  We want the chilling hours for our fruit trees to be just right.
We are just like Goldilocks. We want the chilling hours for our fruit trees to be just right.

What the dickens are chilling hours I hear you wondering?  Chilling hours are the number of hours between 32° F and 45° F from October 1 until February 28.  The number of chilling hours tells you when the tree will bloom.  If you get a tree with too many chilling hours, the tree will never bloom, or bloom so late the fruit will have a hard time developing. If you get a tree with too few chilling hours, the tree will bloom too soon.  Sure enough, a freeze will come after the blooms have come, and that means no peaches for that year. 

This image shows a map of Texas with the chilling hours show by zones.  Courtesty https://aggie-horticulture.tamu.edu/extension/peach/fig1.html.
Chilling Hours in Texas. Courtesty https://aggie-horticulture.tamu.edu/extension/peach/fig1.html.

If you live in Texas, you can find your number of chilling hours on this handy map.  Other states also have maps of the number of chilling hours based on their areas.

So, her friends picked out a tree with the number that we hoped was in the Goldilocks zone.  What to do next?

Tip #5: Don’t Buy the Biggest Fruit Tree

While we Texans like things to be bigger (and things are bigger in Texas), this does not apply to your baby fruit trees. According to Texas A&M, pick out a tree that is in the 30-36″ tall range. Research has shown that this is the ideal size and will catch up with bigger trees after only a few years.

Tip # 6: Fruit Trees Need Full Sun

Did I mention almost all vegetables and all fruit trees need full sun? That is, the place you pick to plant it cannot be right beside your house because the house will shade it.  And it can’t be right under another tree.  It must be where the sun shines mostly all day.  You must go out and look at your yard and find a sunny place to put your tree.

The photo shows peach trees loaded with fruit.  The goal is that after a few years, you have a lovely tree with lots of fruit.  Photo courtesy of Mark Stebnicki, videoographer/photographer for NC Farm Bureau.
The goal is that after a few years, you have a lovely tree with lots of fruit. Photo courtesy of Mark Stebnicki, videoographer/photographer for NC Farm Bureau.

lea did that, and then we had to prepare the soil.  Her spot was covered with Bermuda grass.  Oh, for Pete’s sake, I hear you gardeners thinking.  Bermuda is the grass equivalent to the Blob.  Nevertheless, we forged ahead removing all the grass until we had a nice patch of dirt to work with. 

Tip# 7: Dig a Good Hole for Your Fruit Tree

Our dirt here is clay (I hear another oh, for Pete’s sake.) We didn’t add anything to the clay because we didn’t want the tree to get lazy and only put its roots in the easy part.  We put the tree in the hole we dug with just enough room for the roots, and added back the clay from the hole, and watered thoroughly.  Count to at least 30 if you’re watering with a hose.  It’s amazing how long that is.

Tip # 8: Fruit Trees Love This Trick

Then we used the best trick ever that I learned from someone I don’t rightly remember but if I did, I would give them the biggest kiss ever because it is life-changing in the garden.  I already wrote about this tip but it bears repeating. We put cardboard (corrugated is best) down over the clay. Then, we covered the cardboard with mulch.

The reason this is the best trick ever is because it has so many benefits to the garden.  It keeps the hot Texas sun off the soil, which keeps the soil cooler. Cooler soil means happier little critters in the soil (I’m talking microbes here.) If the microbes can live better, they can help make better soil.  The cardboard and mulch also keep the weeds from getting away from you. If weeds do grow in, they are easier to pull.  And it helps build the soil into something a lot easier to garden in than the sticky clay we have here.

The photo shows lea's newly planted peach tree with the soil covered with cardboard.  Adding mulch over the cardboard is the only step left!
lea’s newly planted peach tree with the soil covered with cardboard. Adding mulch over the cardboard is the only step left!

Voila!

lea has a newly planted little peach tree and we are dreaming of delicious peach salads and pies and I think I’ll go fix me some lunch because my stomach is growling.

Testing Your Soil

This photo shows a test capsule for a potassium in the soil test.   Testing your soil with a simple kit can give you results that let you know what types of fertilizers to add.  This one shows the results of a K test, or a potassium test.  By matching the color of the left column of test liquid to the colors of the scale, t shows between an adequate and sufficient amount of potassium.
Testing your soil with a simple kit can give you results that let you know what types of fertilizers to add. This one shows the results of a K test, or a potassium test. By matching the color of the left column of test liquid to the colors of the scale, t shows between an adequate and sufficient amount of potassium.

This post contains affiliate links. That means that if you make a purchase after clicking on a link I may earn a small commission at no extra cost to you. For more information, click here.

In our last post, The Major Elements Plants Need: N-P-K, we talked about the three important elements that contribute to your plant’s growth.  This post will talk about testing your soil so that you know what is in your soil already that you may or may not need to add.  Looking at your plants’ leaves (and possibly roots if the plant has died) may tell you what elements you may need to add, but if that doesn’t work, you need a soil test.

Testing your soil

Some soil tests can test the big three: N-P-K.  Some can go much deeper and cover calcium, magnesium, and other minor nutrients.  For our purposes, we are going to discuss the big three with the addition of alkalinity/acidity.

pH (Acidity and Alkalinity)

First, let’s discuss alkalinity and acidity.  Alkalinity and acidity are measured on a scale called pH.  The chemical description of pH is that it is number of hydrogen ions in a water solution.  Whether we can remember that tidbit isn’t the important part.  The important part is that pH ranges in numbers of 0 to 14, where below 7 is acidic and above 7 is alkaline.  The lower the number, the more acidic the soil.  The higher the number the more alkaline the soil.   

This pH scale not only shows how the numbers represent acidity and alkalinity, it show the effects on nutrients as you go from very acid to very alkaline.  (Courtesy of Mainland Aggregates)
This pH scale not only shows how the numbers represent acidity and alkalinity, it show the effects on nutrients as you go from very acid to very alkaline. (Courtesy of Mainland Aggregates)

Most experts agree that it is a difficult task, if not an impossible task, to change the pH of your soil by more than a number or two.  But you still need to know, in general, what your soil is so that you can choose your plants with an eye to what their needs are in terms of acidity or alkalinity.

Effect of pH (Acidity and Alkalinity) on Plants

There are just some plants that are going to be hard to grow in your neck of the woods. Although the ease of growing a plant can be the result of many things, alkalinity and acidity rule out many plants for your area, unless you are lucky enough to live in a neutral area. 

Blueberries are not going to be happy in my backyard because they thrive where the soil is acidic.  Yes, you can amend the soil and raise the acidity, but it is going to take a lot of work.  In my case, even the water here is also alkaline, so I would need to amend the soil to raise the acidity, and then water the blueberries with distilled water or rainwater.

Photo of Blueberry bush.  Blueberries!  Oh so luscious!  However, you better make sure you have acidic soil, or are willing to put in a lot of work amending your soil.  Photo courtesy of Gurneys.com
Blueberries! Oh so luscious! However, you better make sure you have acidic soil, or are willing to put in a lot of work amending your soil. Photo courtesy of Gurneys.com

Grammy’s Alkaline Soil

I tend to just deal with the alkalinity of my soil rather than trying to change it.  For instance, where I live the soil is alkaline, and strongly alkaline.  What that means in practice is I don’t grow perennials that need an acidic soil.

One problem with very alkaline soil is that it is hard for iron to dissolve in the water for uptake into a plant. That can lead to a plant that looks like it’s low on nitrogen, but it is actually fine with nitrogen. Such a plant needs a little something acidic to dissolve the iron.

Plants that Grow In Alkaline Soil

Blooming Back Yard has a nice list of vegetables that do best in alkaline soil: Asparagus (6.0-8.0), Beans, pole (6.0-7.5), Beet (6.0-7.5), Brussels Sprouts (6.0-7.5), Cauliflower (5.5-7.5), Garlic (5.5-8.0), Kale (6.0-7.5), and sweet pea (6.0-7.5).

This photo shows a head of cauliflower.  This cauliflower from my garden is one vegetable that likes to grow in alkaline soil.
This cauliflower from my garden is one vegetable that likes to grow in alkaline soil.

And they also have a list of flowers that like alkalkine soil: Anchusa, Borage, California Poppies, Lavender, Lily of the Valley, Phacelia, Polemoniums, Trifolium (Clovers), Viper’s Bugloss, Wild Marjoram. Of these, I’ve only grown borage, California poppies, lavender, trifolium (clovers), and Wild Marjoram. 

I’ve grown many other flowers with much success.  For instance, my favorite flowers to grow are zinnias, verbenas, wild bergamots, obedient plants, calendulas, as well as others.  The point is that you may be able to grow many things, but some things are going to require a lot of care because of their acid/alkaline preference.

Using a Soil Test and My Results

It is easy to test for alkalinity/acidity.  It is also possible to test for N-P-K, although perhaps not so easily.  With the results of these tests, you can adjust what kinds of fertilizers you might add to help your plants along.

I got a soil test kit from Amazon. Then the fun began.  Okay, not so much fun but interesting results.

Procedure for Testing your Soil

I dug a 4-inch-deep hole to collect my sample of soil. 

This photo shows a hole in the garden and a yardstick showing it is 4 inches deep.  The instructions for the soil test say to dig a hole 4 inches deep and then gather your soil from there.
The instructions for the soil test say to dig a hole 4 inches deep and then gather your soil from there.

The test instructions say to avoid touching the sample with your hands.  I was also careful to use a clean bucket and other implements.  Lay the soil out on a tray to dry, and remove any weeds, stones, or other big particles.  Using a clean implement, crush any lumps of soil.  Mix thoroughly. 

Testing your Soil for pH

For the pH test, you fill the little container with a tiny bit of soil up to the line indicated.  Then with the provided dropper you add water.  The first time I used regular tap water.  The second time I used distilled water.  It made a huge difference.  Finally, you add the contents of a capsule provided by the test and shake it up.  After the soil settles and the color develops in about a minute, you have the results. 

This is the result using tap water. You can see that the color is very blue and doesn;t match any of the scale on the right.

This is the result using distilled water. You can see that my soil is very alkaline.

Here are the results of the pH test, the first with tap water and the second with distilled water.  You can see that I am dealing with extremely alkaline soil.  Acidic amendments may help, and some frequently recommended amendments are definitely not going to be good for my soil and my plants.

Testing Your Soil for N-P-K

For the N-P-K tests, you make a solution of soil and water first. 

Testing Your Soil Procedure

You use 1 cup of soil and 5 cups of distilled water (or a 1 to 5 soil/water ratio).  After shaking the soil/water solution, you let it settle for 24 hours. 

This photo shows a mason jar containing soil and water.  For the test you add 1 part soil to 5 parts water, shake thorooughly, and let sit for 24 hours.
Add 1 part soil to 5 parts water, shake thorooughly, and let sit for 24 hours.

Using the dropper, you add the liquid part of the solution to fill the little containers for the N, P, and K tests.  You add the matching color of capsule to the container, close the lid, and shake thoroughly.  Allow the color to develop for 10 minutes. 

Results of N-P-K Tests

Here are the results of the nitrogen, phosphorus, and potassium tests. 

Testing your Soil for Nitrogen

This photo show the nitrogen test which by the color of the solution shows shows a deficient amount of nitrogen in the soil.  Time to add compost and other sources rich in  nitrogen.
The nitrogen test shows a deficient amount of nitrogen in the soil. Time to add compost and other sources rich in nitrogen.

It looks like my soil needs nitrogen, which is not surprising since I took my soil sample at the end of the hot summer after growing tomatoes there.  Nitrogen is used heavily by tomatoes, and the heat also decomposes nitrogen.  (This is another good reason to move your plants around to different areas of the garden, so that plants with different needs will perhaps be moved to a better spot for them.) 

Testing your Soil for Phosphorus

The soil test shows an adequate amount of phosphorus. We are looking for approximately the same shade of the color, not an exact match. No need to add more.

Testing your Soil for Potassium

This photo shows the potassium test (K) shows an adequate suppy of potassium in the soil.
The potassium test (K) shows an adequate suppy of potassium in the soil.

The P and the K tests look like those two elements are adequate.

Conclusion

I’m not too happy about the ease of interpreting the soil test. The colors do not match the scale exactly. Even so, we are able to get an approximate scale of how much of each nutrient is in the soil. For an even more precise measure, you should check with your extension agent for a nearby lab that does soil testing.

It is important do to the soil tests so that when you fertilize, you are not wasting money by adding a nutrient that is already there.

The Major Elements Plants Need: N-P-K

This post is the second of a series on fertilizing and the three major elements. To see the first post, click here.

In this post, we will cover how each of these three elements benefit plants, what a shortage in the plant looks like, what an excess of the element does to a plant and organic sources of each element.

 Photo shows a stack of bags of fertilizer labeled N P K 15-15-15.  
Photo courtesy of ttps://live.staticflickr.com/8465/8144240712_a360789692_z.jpg
Bags of fertilizer labeled N P K 15-15-15.
Photo courtesy of https://live.staticflickr.com/8465/8144240712_a360789692_z.jpg

The Major Elements: Three Letters and Three Numbers

The three letters N-P-K are the scientific symbols standing for Nitrogen, Phosphorus, and Potassium. On a bag of fertilizer you will see three numbers. For instance, you might see 15-15-15.  Those three numbers are required labeling and represent the three elements (N-P-K). As well, those three numbers represent the percentage of the three major elements: nitrogen (N), phosphate (P2O5), and potassium (also called potash) (K2O3).  For example, a bag which is labeled 20-10-5 means 20% of the bag is nitrogen, 10% phosphate, and 5% potassium.

You may find smaller N-P-K numbers on organic fertilizers, but in this case bigger isn’t necessarily better.  The sources of organic fertilizers are more available to plants and can release the elements more slowly. Those two attributes may cause the organic fertilizers to work better in your garden.  Your microbes and the planet can benefit from organic fertilizers and you can still get the strong, healthy growth you want.

#1 of the Major Elements: Nitrogen

When you think nitrogen, think green and leaves.  This major element supports the growth of leaves, and leafy plants, such as lettuce, use more nitrogen to grow.  Because this element is water soluble, it moves though the soil and through the plant easily.

Plants Use of Nitrogen

Nitrogen is part of the chlorophyll molecule and it is the chlorophyll molecule that makes plants’ leaves green.  Through the process of photosynthesis, sunlight and chlorophyll create the food necessary for the plant’s leaves to grow.  This major element supports rapid growth, seed and fruit production and particularly is used by leaves and forage crops.  Fruit size increases with higher levels of nitrogen.

Nitrogen deficiency

Lack of nitrogen causes leaves to look yellow, a condition known as chlorotic.  Because nitrogen is also a part of the protein molecule, plants deficient in nitrogen will have less protein compared to those with adequate nitrogen. 

Plants deficient in nitrogen may be stunted, with older leaves or whole plants yellowish green.  This is a result of plants taking nutrients away from older leaves, and sending it to the younger ones in a desperate attempt to survive.  This process is called “firing” leaves. 

Nitrogen deficiency can also cause the plant to set less fruit or for the fruit to be misshapen.

This photo shows leaves yellowing  which can be caused by a deficiency of the major element: nitrogen.
These leaves show yellowing which can be caused by a deficiency of the major element: nitrogen.

Excess Nitrogen

According to Goodfruit.com, fruit color development can be limited by the presence of too much nitrogen.

Too much nitrogen can cause leaves to be too green, cupped, tinged with yellow or brown, and may leave plants vulnerable to insects.  Remember, healthy plants resist insects the best. Also, too rapid a growth from excess nitrogen can cause the stems of plants to be weak.

Organic Sources of the Major Element Nitrogen

One very good source of nitrogen is fresh manure.  Fresh manure is mostly urea, and the molecular equation for urea is CH4N2O.  The N in that equation shows that it contains nitrogen.  Fresh nitrogen is so strong it can burn your plants.  Therefore, if you plan to use it immediately, spread the manure on your garden bed, and wait a month before planting. 

Photo shows that you can tell the grass is greener next to the cow pie.  Photo courtesy of Kim Newberg
You can tell the grass is greener next to the cow pie. Photo courtesy of Kim Newberg

Alternatively, you can add fresh manure to your compost pile, and after composting, add it to your garden bed. 

Bloodmeal, fish meal, fish emulsion and bat guano are other good sources of nitrogen. Remember the stories we heard in elementary school about Native Americans burying a fish alongside the seeds they were planting to increase the fertility of the soil.  The fish added nitrogen to the soil.

#2 of the Major Elements: Phosphorus

The second number on the fertilizer bag is phosphorus.  When you think of this major element, think roots and fruits.  Phosphorus, like nitrogen, plays a major role in photosynthensis, just in a slightly different way. 

Phosporus, unlike nitrogen, is not water soluble and therefore does not move thorough the soil. It is often applied in bands to allow the roots of the plant to find it.

Plants Use of Phosphorus

Phosphorus effects rapid growth, encourages blooming and root growth.  This major element is also important for proper plant maturation and withstanding stresses, such as heat stress or wind stress.

This photo shows the roots of a tomato plant.  The second of the major elements, phosphorus, aids in the growth of roots.
The second of the major elements, phosphorus, aids in the growth of roots.

Phosphorus deficiency

Purple foliage, dull, yellowed foliage, and slow growth are symptoms of phosphorus deficiency.   

Excess Phosphorus

Phosphorus accumulates in the soil so be careful not to add too much of this major element sources.  Too much phosphorus could lead to a zinc deficiency

Organic Sources of the Major Element Phosphorus

Greensand and soft rock phosphate are organic sources of phosphorus.

#3 of the Major Elements: Potassium

When you think of this third major element (potassium, scientific symbol, K), think fruit quality and disease prevention. ‘

You will sometimes hear the term potash used.  This refers to the chemical compound K2O3 (remember potassium is an element.)

Potassium plays a role in opening and closing the tiny openings in leaves, called stomata. 

The stomata allow CO2 to enter the plant during photosynthesis, and then allows the plant to convey waste (including O2) out of the plant. You may recall from high school biology that plants use CO2 and give off O2 which allows humans and other animals to breathe.

Plants Use of Potassium

Plants use potassium in two major ways. First, potassium regulates the stomata.  The ability of the plant to close the stomata helps plants resist drought (by conserving water) and heat.  Second, potassium contributes to photosynthesis which builds protein and fruit quality.  The result of these two uses of potassium is to reduce the diseases because it contributes to the plant’s overall health.

Potassium deficiency

You can see potassium deficiency in your plants by brown or yellow scorching around the edges of leaves, flowers may be dull and sparse, fruit yield may be low and of poor quality. Plus, the deficiency of this major element causes plant tissues to be soft and susceptible to attack from pests.

This is a photo of soybeans showing the brown edges characteristic of the lack of the third major element potassium.  Photo courtesy of Creative Commons.
Soybeans showing the brown edges characteristic of a lack of the third major element: potassium. Photo courtesy of Creative Commons.

Potassium excess

An excess of potassium can block the uptake of magnesium, causing a deficiency of that element.

Organic Sources of the Major Element Potassium

Organic sources of potassium are coffee grounds, granite sand, greensand, kelp meal, and Sul-Po-Mag.  Sul Po Mag is a naturally occurring crystalline material, known as langbenite. It is an excellent source of readily available sulfur, potassium and magnesium which has been derived from sulfate of potash magnesia.

Excess Fertilizer Kills

While an appropriate amount of fertilzer can lead to healthier plants, take caution. Too much fertilizer will stunt or kill your pllants. As with many things in life, use moderation. The best method is to use a soil test to determine which elements are lacking, and treat according to the results.

Fertilizer has scorched the plants in this photo. Too much of a potentially good thing isn’t good.
Photo courtesy of Sten Porse, CC BY-SA 3.0 http://creativecommons.org/licenses/by-sa/3.0/, via Wikimedia Commons

Makes you want to say “Hmm”

“We throw away nutrients for our plants in underground sewage systems. We do this in such a way that pollutes underground water tables. Then we buy manufactured “nutrients” for our plants which aren’t as good as what we threw away. This is modern day wastewater “technology”. Michael Reynolds – Earthship Vol. 2: Systems and Components

Fertilize Your Plants

With the cooling of temperatures, fall is a great time to fertilize your plants.  But all fertilizers are not created equal, and you only need to put on your plants what they need.  The next three posts will cover the basics of fertilizing.  The first will address the underlying concepts you need to know about fertilizing.  The second will cover N-P-K, the three major elements used in commercially available fertilizer.  The third will cover soil testing.

Why Fertilize Your Plants?

You can think of plants as little machines with the elements found in soil as their fuel.  Chemical reactions are happening all the time within the plant cells in order to produce chlorophyll which enables the plants to grow roots, stems, leaves, and fruit.  In those chemical reactions, the plant takes what it needs from the soil and the air.

The top six inches of soil is 45% minerals. The remaining percentage is biological matter such as microbes and decomposing organic matter.  The minerals in the soil are composed of 92 different elements. The plants growing in your garden use all of those 92 elements to varying extents. 

This photo is of a handful of soil.  Soil is  composed of minerals (which break down into 92 elements) and decomposing organic matter.
Soil is composed of minerals (which break down into 92 elements) and decomposing organic matter.

Even though there are 92 elements, when you fertilize your plants, the bag from your local nursery will emphasize only three elements: Nitrogen (N) , Phosphorus (P), and Potassium (K) which are normally referred to as N-P-K.  These three elements are the most needed nutrients for happy plants.   We will talk about those three elements in detail in the next post. For the time being, we will talk about general fertilizing principles.

This photo is of a bag of fertilizer.  The three numbers on every fertilizer bag are telling you how much N-P-K they contain.
The three numbers on every fertilizer bag are telling you how much N-P-K they contain.

Four Important Things You Need to Know about Fertilizing

You’re probably beginning to think fertilizing is quite complicated, and you would be right!  Adding stuff from a bag is one thing you can do, but it may not give you results you want. In addition to the N-P-K we mentioned above, there are a few considerations in making sure your plants get what they need. 

In the next few paragraphs, we’ll talk about four important things to know when you fertilize your plants including the Law of Minimum, the effect of excess nutrients, the effect of heat and cold, and the effect of microbes.

The Law of Minimum

Justus von Liebig was a German agricultural scientist and chemist.  He discovered the Law of the Minimum which states that “yield is proportional to the amount of the most limiting nutrient, whichever nutrient it may be.”  By yield, he means how much of a crop can be produced. In other words, the plant can’t grow and create fruit without all the nutrients it needs.  This means that you can have skads of one nutrient, but it won’t help the plant grow better if some other nutrient the plant needs is in short supply.

This image is a sketch of Justus von Liebig who contributed many findings to agriculture and biochemistry.  Thanks to him we won't waste unnecessary fertilizer.  Image Credit:  Hein Nouwens, Shutterstock contributor
Justus von Liebig contributed many findings to agriculture and biochemistry. Thanks to him we won’t waste unnecessary fertilizer. Image Credit: Hein Nouwens, Shutterstock contributor

When your plants don’t have enough of one of the elements they need, let’s say magnesium, the plant’s growth will not improve no matter how much NPK fertilizer you put on it as long as it already has the NPK it needs. It’s as if your car has run out of gas, but it is full of oil. Adding more oil isn’t going to help you.

Excess Nutrients

If there is too much of a particular nutrient, it can be just as bad as if there is a shortage of a nutrient.  Excesses of one element or another can combine with another element making it unavailable to the plants even though those elements are present in the soil.

As a result, it is best not to over-fertilize.  We’ll talk about some of those situations in the next post.

Effect of Heat or Cold

The temperature of the air also makes a difference in the way that the plant can take up nutrients.  As we were discussing, plant growth occurs as a result of a chemical reactions.  Chemical reactions change based on the ambient temperature. Adding more fertilizer will not help when the temperature is too hot or too cold.

This photo shows tomatoes suffering from heat stress.  No amount of fertilizer will help them grow better.  You can see how the plant "fires" the lower leaves in an effort to conserve its resources to survive.
These tomatoes are suffering from heat stress. No amount of fertilizer will help them grow better. You can see how the plant “fires” the lower leaves in an effort to conserve its resources to survive.

We understand this quite easily from situations in the kitchen.  If you want to dissolve sugar into a liquid, it will be a lot easier if the liquid is hotter.  A glass of iced tea full of ice cubes makes it harder for the sugar to dissolve. Although that is not technically a chemical reaction, it works in a similar way.

This photo show a thermometer and the sun to represent heat and cold.  Different plants like different temperatures and the outdoor temperature restricts what nutrients a plant can take up.
Different plants like different temperatures and the outdoor temperature restricts what nutrients a plant can take up.

In our Texas gardens, we usually think of heat as being a limiting factor, and that is quite true.  When the temperature soars, our poor darling plants may not be able to take out of the soil the nutrients needed for optimum growth.  This is true of cold as well.  When the temperature dips, it changes which chemical reactions can occur and how fast they can occur.

Effect of Microbes

While we have been discussing the elements required for growth of our plants, microbes in the soil can play a big role in the uptake of the various nutrients.  For example, Rhizobium is a bacterium that takes nitrogen out of the air and converts it to the type of nitrogen that plants can use.  These hardworking little bacteria fertilize plants for us.  Because of this, we need to make sure we keep working hard to create an environment that supports the microbes. One of the worst things you can do for the health of microbes is to add too much fertilizer.

In the very interesting article Making the Most of Microbes, authors Mike Amaranthus, Larry Simpson and Jeff Lowenfels say “According to biologists, a single tablespoon of healthy farm soil may contain up to a billion assorted microbes, a mile or more of fungal filaments plus scores of various macrofauna creatures such as nematodes and arthropods.”

This photo shows microscopic views of soil microoganisms: bacteria, fungi, algae, and protozoa.  All those soil microbes contribute to the health of our plants.
All those soil microbes contribute to the health of our plants.

These microbes carry out work needed for healthy plant growth, including making minerals available for plants to use, such as taking nitrogen out of the air or water out of the soil.

Mycorrhizal fungi take insoluble elements and convert them to soluble elements so that plants can use them.

Not only do microbes help feed the plants, the plants help feed the microbes.  The majority of plants almost half of their energy to feed the soil microbes.

Balance is Key

Balance is key.  Adding too much of an N-P-K fertilizer, for all the reasons we’ve discussed, may not give you optimum plant growth.  We must strive to have a balance of the nutrients our plants need.  Do a soil test to determine which of the major nutrients are lacking in your soil, and try to use organic nutrients to supply those needs. Fertilizer must be applied in just the right kind in just the right amount.  We’ll talk about this in a later post.

Compost is the best kind of fertilizer because it is naturally balanced, has a wide variety of elements available, and is chock full of microbes.  If you can’t get compost, organic fertilizers are second best. 

In our next post we will discuss the basics of fertilizers and what each nutrient has to offer your plants.

My Favorite Varieties — Summer 2022

I love to hear from other gardeners who live in my area about their favorite varieties of different plants . Jerry Parsons, the famous A&M horticulturalist and plant developer, taught a session in my Master Gardener training class. He rated plant variety as one of his top three factors in contributing to successful gardening. Before his class, I paid little attention to plant varieties, After his talk, well of course, I learned my lesson. Especially in our hot-as-the-dickens summers, some varieties thrive, and some varieties fail spectacularly.

Happily, our temps have moderated these last few days and it couldn’t happen soon enough for us, since we have endured what seemed like unending 100° rainless days.  Since so many of my plants have struggled, I say they are mostly dead, like Westley in the Princess Bride after he was taken to the Pit of Despair.  In fact, I’ve taken to calling this summer the “Pit of Despair” Summer. Now after some nice rainy days with highs only in the mid-nineties, we have the energy to take stock and write a report on how things went this season.

My Favorite Varieties of Tomatoes

I grew several varieties of tomatoes. I got many of them as starts from the Sunshine Gardens Plant Sale which occurs the first Saturday of March every year.  I have also added links to a seed source for many of my favorites.

The slicers were Black Krim, Lemon Boy, Purple Cherokee, Celebrity and Green Zebra.  I grew one paste tomato which was Midnight Roma. I grew three cherry types:  Austin Pear, Sunshine and Sun Gold. 

This photo shows sliced Lemon Boy tomatoes on a plate.  My favorite tomato variety is Lemon Boy.  These tomatoes  are tasty as well as a beautiful yellow color.
My favorite tomato variety is Lemon Boy. Lemon Boy tomatoes are tasty as well as a beautiful yellow color.

The most productive slicers were Black Krim and Lemon Boy.  Both of these two also lasted the longest into the season.  I got quite a few Green Zebras, though not enough to match the Black Krim and Lemon Boy.  Still, I will grow it again just because it is so unique and the taste is so zesty.

Neither Purple Cherokee or Celebrity produced many fruits, although my Celebrity looks pretty healthy post-“Pit-of-Despair” so I hope it gets its legs in the fall season.  I have a couple of Purple Cherokee in the ground for the fall season so we’ll see how well they produce then.

My Favorite Varieties of Cherry Tomatoes

In the cherry tomato category, Austin Pear was the most productive.  The fruits are large for a cherry type, and the flavor is strong and tart.  My other cherry types just didn’t produce as well this year.  I grew Sunshine cherry, and Sun Gold which had been very dependable in years past.  They are still putting on fruit though even though they look skeletal, but only one or two a day.  I breakfast on them every day as I go through the garden.  It’s not worth getting out the harvest basket for that.

This photo shows Sunshine and Sun Gold  tomatoes,  Although Austin Pear was my favorite variety, I still like Sunshine and Sun Gold  tomatoes. Sun Gold is biggest, but Sunshine is tastier.
Although Austin Pear was my favorite variety, I still like Sunshine and Sun Gold tomatoes. Sun Gold is biggest, but Sunshine is tastier.

My Favorite Varieties of Pepper Report

My peppers have used the spring/summer season to grow plants, not peppers.  But mid-August, they started to produce.  It looks like the Corno di Toro is going to be a winner by a landslide for productivity.  Also, I have a new pepper called Cubanelle that is starting to produce nicely.  It is a sweet pepper that I was hoping might perform better than traditional bell peppers in our heat. 

My Jupiter bell pepper plant produced a few peppers in the early part of the season, but then took a break during the hot part of the summer.  The plant looks very sturdy and healthy and a few more peppers have set now, so I am hoping it will produce a good fall crop.

This photo shows lots of different types of peppers-- cubanelles, serranoes, habaneros, and jalapeños.  The harvest is plentiful now that summer is  over the hump.
Lots of different types of peppers– cubanelles, serranoes, habaneros, and jalapeños. The harvest is plentiful now that summer is over the hump.

I am beginning to get a good crop of Impala serranos and Jedi jalapenos which are very large but not very hot.  I would like them a bit hotter.

For heat, I have a habanero plant which is possibly in too shady a spot, so I only get the occasional pepper from it.  I have trimmed back the tomatillos which were overtaking it, so I hope it will produce better in the fall.

Tomatillos

I renamed my Cisneros tomatillo plants Godzilla after they took over the garden.  The joke of it is that the plant label said it didn’t require staking.  No, it didn’t require staking because it used any other available plants to grow on.  They were incredibly productive, more than I wanted, but I will be making some yummy tomatillo salsa when I get to it.

This photo shows lots and lots of tomatillos but it's from one Godzilla of a plant! My favorite variety of Tomatillo was Cisneros.
My favorite variety of Tomatillo was Cisneros. Lots and lots of tomatillos but one Godzilla of a plant!

My Favorite Varieties of Okra

My okra plants are just getting started.  I planted Carmine Splendor, and we have already had a meal or two.  These okras are very tasty.  Read more about growing great okra here.

This photo shows okra of various sizes from small to too big.  My favorite variety of okra was Carmine Splendor.  Be careful to monitor your okra every day or they will get too big to be tender.
Be careful to monitor your okra every day or they will get too big to be tender.

The okra will continue into the fall producing, with any luck at all, until the first killing freeze.  You must keep your eyes on the okra because it gets big so fast if you don’t check them every day, they end up too big.

This photo is of an okra blossom.  I'd grow okra just for the blooms even if I didn't love to eat them.
I’d grow okra just for the blooms even if I didn’t love to eat them.

My Favorite Varieties of Cucumbers

I got my cucumbers in late and they are now covered in aphids.  I treated them by spraying a solution of 1 teaspoon baking soda and1 tablespoon dishwashing soap to one quart of water.   I hope they can recover. 

The winner in the cucumber category is lemon cucumbers.  My daughter got her cucumbers in earlier that I did and has had a very nice harvest of them.  If you haven’t tried this type of cucumber, make it a priority the next time you plant cucumbers.  You won’t be sorry.

This photo is of a Lemon Cucumber which was my favorite variety of cucumber.  Lemon Cucumbers are very tasty -- mild and sweet.   We love them in cucumber sandwiches.
Lemon Cucumbers are very tasty — mild and sweet. We love them in cucumber sandwiches. (Photo credit @leab38)

Flowers

My flowers haven’t been doing very well this year. I guess it’s because of the heat.  I’ll tell you about the worst ones first, and then the ones that did better.

This year my impatiens fit into two categories:  dead or mostly dead.   I even had some plants I grew from cuttings that I planted out in pots in the front, and they outright died.  I was hoping to find some healthy impatiens to replant, so my daughter and I took a little trip to the Natural Gardener.  It gave my bruised ego a boost to see that their impatiens looked exactly like my impatiens, which are usually a very dependable source of pretty orange blooms.

My geraniums likewise are the worse for the wear after this summer, and some have completely died, while others are limping along with tiny little leaves and no blooms.

My obedient plant put swaths of big blooms on every stalk, but the blooms fell over just as soon as they had opened.  It is disappointing to wait so long for a flower and then have it poop out just as it blooms.

This photo is of a swath of obedient plants blooming.  When they first bloomed, the obedient plants looked pretty good.
When they first bloomed, the obedient plants looked pretty good.

My zinnias haven’t done what I wanted them to do.  Although I planted tall ones which I like for cutting, it seems like all the ones that came up are rather short.  I have had some very vibrant fuchsia ones that I don’t know what seeds those were, but they are very pretty.

This photo is a close-up of a fuschia colored zinnia.  I love the color and the fanciness of this zinnia, even if it isn't orange!
I love the color and the fanciness of this zinnia, even if it isn’t orange!

My begonias are also limping along.  Some of the pots are half dead, some are mostly dead.  I think the flowers are thinking they are in the “Pit of Despair” this summer. 

Flowers That Thrived

Happily, there were a few flowers that have survived the “Pit of Despair” summer.  The winners in the flower category are my climbing roses, angel trumpets, plumeria, and lipstick plant.

My Westerland climbing rose is doing great, and is not suffering at all from the heat — at least as far as I can tell.  I have two plants which are growing up parallel trellises which I installed earlier this year.  In between the trellises is a garden path.  I wanted to make an arch but couldn’t find any that were cheap enough for my budget.  I’m hoping that the rose will grow enough to make the arch out of their canes.  I finally got this rose in a microclimate that matches its preferences because it is as happy as can be, and blooming quite a lot.

This photo is of a bloom on a Westerland rose which was my favorite variety of rose.  Beautiful blooms and vigorous growth on my Westerland climbing rose in spite of the "Pit of Despair' summer.
Beautiful blooms and vigorous growth on my Westerland climbing rose in spite of the “Pit of Despair’ summer.

My angel trumpets are doing well and still blooming on an every-other-day or so schedule.  Although they only stay open in the early morning, they are very spectacular blooms that are worth stopping to admire.

This photo is of a bloom on an Angel Trumpet.  Angel Trumpets put on a stunning bloom.
Angel Trumpets put on a stunning bloom.

Two tropical flowers that are doing well is my plumeria and lipstick plant.  Since both are rather tropical, I am surprised they are thriving through the heat, but both have had blooms consistently all summer long.  Now my lipstick plant is not a show stopper, but a bloom is a bloom.

Be sure to leave a comment with your favorite varieties from Summer 2022 — our ” Pit of Despair” summer!

Six Plants I Hate

Plants I hate. Now, I grew up in the 50s (I’ll pause while you do the math). 

Girls weren’t supposed to hate.  It just wasn’t ladylike.  The world is a lot better place now when people can be honest. 

And honestly, even though I love most plants, there are a few that I just can’t abide.  Maybe I am writing this post because I am grumpy today so I hope you’ll indulge me in getting this off of my chest.

Plants That I Hate # 1: Ligustrum (Privet)

Ligustrum (Privet) is a common shrub.  It definitely makes it high on the list of plants I hate.  It’s ugly (from my point of view and I know there are lots of points of view.)  There are many varieties of Ligustrum and all of them are invasive in Texas. My neighbors have Ligustrum and I am always digging up volunteers that have decided to live at my house.  If you don’t get them quickly, they are hard to get rid of because they will keep coming back from the roots.

This is a photo of an ligustrum that came uninvited and plunked itself right down in my yard.  Now I have to pull it. This is a plant I hate.
This ligustrum came uninvited and plunked itself right down in my yard. Now I have to pull it.

Ligustrum decides to live lots of places, and when they enter wild areas, the number of bee species and butterfly species decline.  Take a look at this blog post:  5 Important Reasons to Not Plant Ligustrum (Privet) By Haeley Giambalvo

This beast is an overgrown ligustrum bush. It is likely the parent of all the ligustrum that sprouts in my yard. I’d rather it weren’t so close to my house.

There are lots of Texas native species that look a lot better and don’t invade your neighbors’ yard or your greenspaces. Please plant those instead of this beast.

Plants That I Hate # 2: Nandina (Sacred Bamboo)

Nandina (Sacred Bamboo) has nothing sacred about it in my garden or in any garden in Texas. It is a native of Japan, China and India.   Although Nandina came to America in 1804, its popularity started in about the 80s or 90s. 

You’d think it was candy so many new houses were lined with Nandina.  Like Ligustrum, Nandina is so invasive that now it has escaped cultivation and now grows in almost every greenspace it can find.  You can’t kill it by cutting it down.  You have to dig up the whole shrub, or cover it with herbicide (which I just don’t like to do.) 

Nandina stands in a row beside a house.  It isn't that it is so ugly.  The problem with Nandina is that it crowds out native vegetation that supports our bird and insect populations.  This is a plant I hate.
Nandina stands in a row beside a house. It isn’t that it is so ugly. The problem with Nandina is that it crowds out native vegetation that supports our bird and insect populations. This is a plant I hate.

Luckily for me, I don’t find this one popping up in my yard, but I’d like to be able to go on a hike and not see Nandina growing there.  Granted, Nandina is a worse problem in the south (like my house) than the north, but keep in mind things can migrate southward. 

Nandina is toxic to the beautiful bird, the Cedar Waxwing.  Lewis Ginter Botanical Gardens calls Nandina one of the dirty dozen.  For more information on the problems with Nandina, visit this site.

Photo is of the cedar waxwing bird.  If we want more of these beautiful birds, we need to have fewer of one of the plants I hate:  nandina plants.
If we want more of these beautiful birds, we need to have fewer of one of the plants I hate: Nandina plants.

Plants That I Hate # 3: Ruellia Simplex, or Mexican Petunia

Ruellia Simplex, or Mexican Petunia is a lovely plant at first glance.  This sneaky plant is one I hate. It’s really better to look twice because it can take over your entire garden in one year, and then you will spend the rest of your life trying to get rid of it.  I have written about this one before and even I am daring to repeat myself (a Grammy prerogative, I think.)  I may yet write about it again because it hikes my ire up higher than the Tower of the Americas. 

This is a "daily double" shot.  The purple blooming invasive is the ruellia.  It's right in the middle of a ligustrum.  This is a plant I hate.
This is a “daily double” shot. The purple blooming invasive is the ruellia. It’s right in the middle of the plant #1 I hate: ligustrum. This is a plant I hate.

Ruellia Simplex can spit its seeds over 10 feet away, and then it will spread by rhizomes that can go under just about anything — fences, rocks, tarps.

A “Plant I Hate” Morality Tale

I bought my house from two lovely, sweet people.  Some years before I bought their house, they made the mistake of buying a couple of little pots of Ruellia Simplex.  It first took over the side yard.  Then the back and then the front. 

In the front yard, they finally gave up on gardening in the ground because the Ruellia Simplex took over.  They pulled as many as they could and tried as many methods as they could to get rid of them.  Finally, they laid a tarp over the ground, and covered it with pebbles, and built raised beds for their gardens.  I’ve lived in my house for seven years now, and I still am pulling up Ruellia Simplex. 

Take their story as a morality tale.  Don’t succumb to those pretty little seed-spitting purple flowers.  They will become your own hellish version of the Blob.

Plants I Hate # 4: Bermuda Grass

And speaking of the Blob, Bermuda grass is another one of the plants I hate. It is trying to take over the world.  It has several other names, one of which is Devil Grass.  I certainly think that is an accurate moniker for the evil plant.  Other authors agree with me.

This is a photo or Bermuda grass which doesn't even need soil to grow in.  It's perfectly happy growing straight through the concrete sidewalk.  But if you take a short nap to try to escape the summer's heat, this fast grower will completely take over your garden beds.  This is a plant I hate.
Bermuda grass doesn’t even need soil to grow in. It’s perfectly happy growing straight through the concrete sidewalk. But if you take a short nap to try to escape the summer’s heat, this fast grower will completely take over your garden beds. This is a plant I hate.


Ruth Gonzalez in her column, Ask Ruth, seems to feel the same way I do so maybe I’m not just being grumpy.  “For me, Bermuda grass presents a mind-boggling obstacle to pleasurable gardening. Bermuda grass laughs at your thorough weeding job and respects no boundaries. It quickly and ceaselessly overtakes your garden beds without any regard for your prospective harvest.”

Because Bermuda grass reproduces with growth above the ground (stolons), below the ground (rhizomes), and by seed, it keeps coming and going – and I mean going everywhere. I have heard master gardeners joke that Bermuda grass could go under a freeway and come out the other side.  That is probably a hyperbole (which I remind you is something I like).

I have heard no solution to this devil except by solarization (putting down plastic for months on end.) Even that is not probably not a permanent solution.  Bermuda grass seeds can survive for 2 years, and my guess is that it can regrow after months of being under plastic.

The best solution I’ve heard is to pull it meditatively.  It will give all of us plenty of meditation time for years to come. Maybe I’ll try meditating on being grumpy.

Plants I Hate #5: Virginia Creeper

Virginia Creeper doesn’t make it onto the invasive lists. Why? I have no idea. It causes me a lot of problems.  It has grown over, under, around and through my fence. I hate it. 

My thoroughly considerate neighbors didn’t plant this local version of our very own “Blob,” I am sure.  Probably no one that ever lived at that house planted it. 

But now that it is here, it has a mind of its own earning it a place in the plants I hate. Virginia Creeper wants to take over my garden.  Frustratingly, I have different ideas of what I want to grow beside my fence.

Virginia Creeper is another plant that explodes the moment your back is turned.

I am forever pulling it out of the beds, and shearing it off the top of my fence.  It has very long roots and has traversed the paths of my garden to come across to the bed on the other side.  This statement is not a hyperbole!

Robert Frost, writes in his poem, Mending Fences, of his neighbor saying good fences make good neighbors.  Sadly, Virginia Creeper is not a polite neighbor and doesn’t respect the fences, mended or not.

Plants I Hate # 6: Nut Grass

I remember as a young girl hearing my papa grumble about nut grass, as he called it.  It was on his list of plants to hate. Nut grass also goes by name nut sedge or the scientific name of Cyperus rotundus.  It is a weed that also likes to propagate itself in devilish sorts of ways.

Nut grass coming up in what I hope to be my garden.  You can see there are two sprouts that are probably connected underground. This is a plant I hate.
Nut grass coming up in what I hope to be my garden. You can see there are two sprouts that are probably connected underground. This is a plant I hate.

If you pull the innocuous looking little grass called nut grass, it stimulates the underground nutlets to multiply.  Even if you manage to pull up the “nut”, you will leave behind other nutlets and rhizomes that will multiply the plants.  So, you pull one, and now four or some other multiple to grow back.

According to The African Journal of Plant Science and Biotechnology, “Cyperus rotundus [nut grass] is one of the most invasive weeds known, having spread out to a worldwide distribution in tropical and temperate regions. It has been called “the world’s worst weed” as it is known as a weed in over 90 countries, and infests over 50 crops worldwide.”

This nutgrass that has been pulled doesn't have the nut developed yet.  The muddy place above the roots is where the nut would develop. This is a plant I hate.
This nutgrass that has been pulled doesn’t have the nut developed yet. The muddy place just above the roots is where the nut would develop.

Some peoples around the world have eaten the underground nuts (tubers) and found it to be a nutritious food source, but in my garden, it is a pain.  I can’t say that I hold the same disdain for nut grass that I do for Bermuda because it hasn’t taken over garden beds wholesale, but it is a weed that I hate just the same.

Well, I must say, I feel better now with all that off of my chest.  And I hope I inspired you to avoid planting some of these plants I hate.

Do you hate these plants I mentioned? What are the plants that you hate?

Six Tips on How to Have Fun in Your Garden

When I was a little girl, we would go to visit my beloved “Grammy.”  Since I became a grammy, I fondly refer to her as “Grammy, Sr.”  Grammy, Sr. and Papa would take us to see what was growing and what was new out in their fields.  We would look at tiny tomato blossoms in their  new greenhouse, or look at Grammy’s carnations and see that there were lots of flowers in bloom.  We would take the time to notice tiny buds which meant more blooms were coming.  Noticing and observing the little things they were growing always made all of us feel better.

This is a photo of my grandmother, Grammy, Sr., in their self-made greenhouse.
Grammy, Sr., in their self-made greenhouse.
This is a picture of my grandfather, Papa Vaughan, in the greenhouse next to a tomato tied to the ceiling with twine.
Papa Vaughan in the greenhouse next to a tomato tied to the ceiling with twine.

Grammy, Sr. and Papa Showed Me How to Have Fun in the Garden

Nowadays, as I walk out in the garden, I look carefully at everything I go by.  I noticed the rose bush was putting on the first buds of the season.  Then, I notice how beautiful the tomatillo bloom was with a purple center and yellow bloom.  I see plants that need water and others that had put on new growth. 

Sometimes if I’m lucky, I get to see a beautiful caterpillar or a new bug I’ve never seen.  Or later maybe I’ll see a bee sipping on a salvia.

A bee sips nectar from a salvia.
Maybe I’ll get to see a honey bee sipping on a salvia.

Once my grandsons and I found a rough earth snake below my zinnia bed, and they had a good 30-45 minutes play taking turns holding the snake and observing it.  Then they built a little shelter for it and relocated it near my bird bath.  It slithered away down under the earth as they watched in amazement.

All of these things make your garden fun.  I have seven tips for you..

Tip 1:  Have Fun Looking Closely at What You See in Your Garden

When you go in your garden every morning, look for something new you haven’t seen before.  You might find little leaf on the mango tree you are trying to grow but looks rather hopeless.  Or, you might find a dragonfly alighting on a stick. 

A dragonfly alights on a stick bringing amazement and joy to the garden.

Amongst your vegetables, you might find a couple of new baby tomatoes that are starting to grow or get bigger.  Or maybe your hibiscus has bloomed and the blooms are spectacular.  Those little things that you see can bring you the greatest joy of gardening.

A gorgeous hibiscus bloom shows a fuschia center and a ruffled pattern on th petals.

That’s the beautiful thing about gardens.  Look closely, notice, and delight (mostly) in what you see. 

Gardening can bring us joy.  When we plant something and later see it grow, it feels rewarding.  According to Carla Manly, PhD, clinical psychologist and author, “When you engage in something that feels rewarding, our dopamine and serotonin levels increase, which puts you in a better mood.”

Tip 2:  Have Fun Not Looking Too Closely at Things in Your Garden

Okay, I just contradicted myself.  This is an important tip, too. 

Ignore the weeds that you just don’t have time or energy to get to today.  Letting those weeds get you down just saps your energy so you can’t do as much.  Once, as I wandered through my garden, I saw a messy spot with dead stalks left over from winter and grasses that needed pulling.  As is my frequent habit, I put that on my mental list for next week.  In my garden, and perhaps in yours, there is more to do than I can get done on any given day.

Sometimes I bring myself down about it.  My inner thoughts go something like: “This corner is awful – full of sticky weed.  Over there, too many weeds are getting out of control.  One of my plants is sickly, or even died.”  It is okay to notice those things.  But it isn’t good to let it bring you down.  There will be a time for a clean-up.  And the tasks that you dreaded may be won’t even be as hard as I thought they were going to be.

Tip 3:  Don’t compare Your Garden to Pictures You See

Remember that when anyone is posting a picture of their garden on Instagram or Facebook, they aren’t going to post pictures of their tomato plants dying or the place where you have a pile of stuff you’ve been meaning to toss out or pass on. 

You can zoom in and see something that looks nice. People might post this picture.
You won’t likely see the true picture of the poor tomato plants stuggling in the heat.

They are going to zoom in on the most beautiful thing they can find.  You can do this yourself, only using your eyes.  Zoom in on what is beautiful to you.

Look at this beautiful brand new mango leaf. The tree isn't dead after all.
Look at this beautiful brand new mango leaf. The tree isn’t dead after all.
Don't spend too much time worrying that the plant is not looking terribly happy.
Don’t spend too much time worrying that the plant is not looking terribly happy.

Tip 3:  Have Fun Expecting to Learn

Some of your plants are going to die.  That’s a fact.  And every time a plant dies, you will learn from it.  As I have written before, Master Gardeners joke that you earn that designation after you have killed 500 plants.  Take time to grieve for your loss, of course, but don’t let it stop you.  It doesn’t mean you are a “bad” gardener, as if there was such a thing.  A gardener is a learner.  And each gardening experience we have helps us be a better gardener.

Gardening is fun because it is a continual learning process about the earth, and about you, yourself.  It also brings a peace and joy that is completely indescribable and magical.  As you slow down and enter into a connection with nature, it feels good to your spirit, and it keeps you coming back for more.  Organic gardening is a metaphor for life, and as you care for your plants, you care for yourself.

Tip 4:  Have Fun in Your Garden Looking for the Magic

As you garden, many magical, miraculous occurrences happen.  One day, a herd of beautiful queen butterflies will be dipping into the nectar from your Gregg’s Mistflower.  And a bubble of joy will start in your belly, and travel up to your mouth, where a huge smile appears.  That bubble of joy will travel with you the rest of the day.  Tomorrow, you may see another miracle – a ladybug, a new sprout, a bloom coming, a green tomato beginning to blush with red – a miracle waits every day for your particular enjoyment.

One day we found this magical bird's nest in a lambsquarters that had grown to shrub size.
One day we found this magical bird’s nest in a lambsquarters that had grown to shrub size.
Does that look to you like a squatter bird left their egg in another bird’s nest?

Tip 5:  Think of Your Garden as a Work of Art

I also think of my garden as a work of art.  It needs a little more work here.  There is looking good. Take this out.  Put this in.  It keeps you busy and feels good.  If we aren’t feeling good as we garden, we need to figure out why we aren’t. 

I have a tendency to over-buy and then have to look for places to put plants I’ve bought.  Or I start a bunch of seeds and then they have to go somewhere. 

Are You a Planner or an Experimenter?

My daughter told me she likes to plan her garden, and if that is you, more power to you!  The earth has room for planners and for experimenters.

I’m more of an experimenter, within the parameters of what I absolutely know will work.  I don’t like to experiment with putting vegetables in the shade.  I know that won’t work.  But if it’s a plant I’m not familiar with, I will push its boundaries and plant it in part sun if the label says full sun. One of the reasons for that is that I know Texas is different than the places many plants are grown, and the labels may not reflect our blast furnace heat.  Then, I’ll watch the plants and see if it is happy in that environs.

Tip 6:  Take the Time to Smell the Roses, but Just Be Sure They’re in the Shade

I shamelessly stole this last one from my daughter.  Yep, smell the roses.  And make sure they’re in the shade when you do. 

Roses smell great especially in the shade. This photo shows a yellow rose in the shade.
Roses smell great especially in the shade.

Do whatever you can to make your life easier as you garden.  I use tools such as a bucket as a stool to make weeding easier.  Check out my post about my favorite tools.

Those are my six best tips on making your garden fun.  I hope you enjoy yourself in your garden today and everyday.  

I invite you, my dear readers, to go notice five small things that are happening in your garden that are fun and see if you don’t feel calmer and more ready to face the world.  Let me know what you find!